


Please Leave Us A Message
Privacy statement: Your privacy is very important to Us. Our company promises not to disclose your personal information to any external company with out your explicit permission.
 Dragon Town Enterprises (Hong Kong) Limited
Congratulations! You have manually made the fan internals. Remember to exercise caution when working with electrical components and always follow safety guidelines.
Omni Breeze Tower Fan,tower fan With Remote,Cooling tower Fan cn+E/MrYApp1zOcZ6UV6lAQG4lLHlVSM6rhDmfVREsgoEgICishEV/VlCBRAMEaEBgJQworJASIFBEEKDEv1WgAAW9AQcMECCgoJgQQAl/QgINAwgECAc42ksJFggDagQGOMvqkMIqrTNgQC2yqlwo8Qbg6VqFlnXr0bZhHQKretDQ1oJafyNq/R4R9XV+D2oDjagJggEXXAFCADdqvS4R/S6BAx4DAHgMcFAPV6BR7iUIcBEGGOXyN6LO54HL54Hb1wi334ABFP1NAQUEOPf74RYI4EMDjwP8rBmepma4/U2o8RFaKLFfSRhQ34CKBo8If54nKFCwQF2jYEATXP5muJqa0dDcKkKd4t3X1gZ/Wxua2ttF4PtbWlHrrkdBUQnKyqvQ2taOzZu2YMf2Hdi8ZTPWbliPzp5VaOvqRmtXF1q6uuQ+3s9neaXa0SgQoBWeZqNa2tHQ3A53c5uIfwIAvkd9c0vw2N3cKp83NBsQoZnXtMDlb0Kdz4eaxkZUNNSjzO1CucuNsjo3Smoo/AkC3Cit0TDAhdLaWhTVVKOgugoFVZUoq6tDTaMH/vZ29K7bgI1btmLTti3YsGUjNm3bhO27dmDDls3oXrNGfo+nKYDqhgYUVlYiNTcXJqsd/8+KWDywIg7LlilRTmEuopfi2BDoWgDLZyKsFRDgdRT5kQ/wOAGRyxRACBf3nOuiKCcokM8NqBD+GT/nd/KczAkBlqvv4jtwrqGAfieOvJYVE5UkpUEARwptAgN9HUd9ju/P+3hOns3fS5Cw9FjO8bz6TD03PvhceWaECbHL4mBaES8VHxkPU1QC4lYmggBAF0U/oQXfiWCCMEBgQVQ8EuIodm2wmimAU0TcZmbkIDsnHxk5+cgqKEJuUQmyC4pknpVXhMycIuTkl6Giqh4ebzO8gTY0+lvQ3NqFdRu2YvuOvdi1cx+2b92NLZt3Ysf2PfjMZ7+AH/z4b/CzZ57FUweexR994xto6upGc3c3tuzZjV0PfhRtXatQVFqF3Lxi1FS5sXH9Vnz+s1/CX37/h/jbv/l7/L9/8k1sXL8ZZSUVSHGmw2JJQVKyEwlmJxKSCQTsSEp2CCAwJzvkN/F3KRDggMViU3DAgATJZitsVvW7bfZU2B0psNkpbFMMseuAzcq/jRL0/Ds5bCny3QQBmaz0LNgdBBIWJCQmIykxGQnxiUhMNsNuT0GKIxMOWzrstnSkpGQhPT0bWZk5yM8rQmlJucCA3tWrsX7jenR2daO+oRHFxWVIS88SwS8wwOpEMmGA1YkkqxNWu4IShAFOe5qI/kce/jh+8Jc/xD//j3/BD/7qh9ixfRecjjTExyYhOcGqAEBMEuKiEwUC8Z87YUA0/90gEIhLQqwBBqJj1VzDgORk9e+Hld9tM2AAoYndocpmh8NuR4pD/+04tyPFbkOq3YEUm1NAQKojBalO/k0IVFKRQQjgTEVGWoYAgcwMQoAs5GRzzEBdTSn27VqHv/vxH+H44Z9geuwQ7s78SsGAuycMGGCAAAKAu+dVBUEAgcBZ4C5BQBgQuBsGA+aPA/PHcHf+KBbmDmNh7n3cnXsvCAPmZ97GfDgMmHotCAPGx1/E5PgvMTn+AibGnsPYyAGMjjyDkdvPYGT4GdwxgMBQ/34M3nwaAzf2o//6fvRdJQzYjxuXD+D65QO4evEALp8/gEvnnsWlc8/hAoHAmRdw9vQvcebkizh94kWcOPYijh19EceOvISjhALvv4zDYXXkcAgEKBjwGo4cfR1Hj72O48fewIljB3H8+EEcP3EIJ08dwsmTB3GKgl9E/yGcPnFQxP/pE6/j7MmDOHfiEM5xPPmGqlOHcO7UQZw/dQgXT7+5uM4cwqWzb+Ly2bdxSde5t3Dx3Ju4dJ4Q4C1cORcGAS6+g2sXf4XrF3+NaxcIAn6NG5d+gxuX35MiELh+5T2pG1cPCwgQACAQQIGAvusEAEfQRxBw7Rj6rht14zj6b56QIhSQeR9BwEkR/oQAAgU0DDAAwMAtCv+z4BicCww4JzBgiKJehD3F/kUMDmoYcEHmPB4cVOKe1w1T2A9cwhChgBRhAO/T9yt4oD7T1ygYQACgoUAQBNy+hjvDuggDCAL6gkAgCANG+hQIGBvA2NgARPxrAKDH8SGMsZbAgHEK//uVwIE7Ag0WfW7AAQEBYRBAwQDCgUFMTAxicnJI1QRHAxzcc70CAgoGGPMwEBAu9PVcjxoQUPhL8b7pEcwsLQMEzM6MYlHNjmFmbgwzxqgE/xjm5iYwPzeBuTkt/icUBOBxWM0bEECPvy8MIAAgCNDCn3M+Qx9rGEABSxjwf1z43+eZQaH/QTDAgAJLrwu9W0gcz8zP3AcGzGBaYMHi30NxHxLVswIFeBwOCKZn1b0KGBAITGFW131+i7wT33dhBhoGfBAQ0GAABgzQx3J9GAyYWwiBAAKB8HeenQvBAEKBcBgQAgEU7Uq4a3FP4c8aMyCAgIDpGWgoIOenpzHBz43ivSGwEA4CNAAgFOA8NGoYMG7AAI7jM/MYWwIDNBAgDLg9sYDh8XmpobE5DEgt4NboAvpGFnBz5K4UgcDSun5bA4FZAQE3BR7MQ8EACAwYGicMSMhEhCkEAyLjHQICFAywIiLehhUmGyLiLIiiIyDBhii6AkxWrDSOeY6QIFZggBMx5hQQBMRaUhUEsKYj1pqOlZZUxNrTBQRE2dPFFWByZiHOkYn4lCxwbkrJRlxqDmLTchGbkYeY9DxxA5gyCxCXng9TZqG4AuIyihCdUYiYzGIQBMRllarKLoXJcAYk5hIG0BVQKu6A5NxKmHMrkZxbAUtuJawEAXkVsOQpR4A5vzwIBBQMqIS1sAqJ+eVSSfkKBiQXVIBzugIsdAQUcV6B5IJymHmOTgGK/eIqcQZQ/AcBgAEElOhX1/GzxU4BAgEFA+ylNbCV1IgjwFnmQmp5vXIGlNUhrawWubX1qPA3wbeqF23r16Nt3VoEurtQ3xxALV0BPg9qfPUCBQgCaugMCDTAFaDI51yt/tMZIO6AgAcKCjTCHWgEBT/Ff52ABS/qAnQDUPR7ZcVf5j5vcOXfzZV6wxngIgTw+9FA8e+jOyAEA+rEFaBgAFf5NQyo8jSKK4AwgKKf10nJNbyOv0sBAjdhAsW3OANa4G1X4t3f3obmri609nQLGKhxu1FUXIqamjp0d/dg29bt2LN7D7bt2I5NW7dg9fp16F7di/aeLrT3dKO1uwvNnZ2y6u7v6ECgoxPeljY0Usw3tagiBGhqg6upFS6u9jc1y4o/IQcFPx0E9YQDTQQAbfDIfc1oaGpGvS8AV6MXNfX1qHDVocLlQnldHcpqXSipqUNxdR2KqmtRLFWDkuoaFFdVobCyAkVVlSioqEBpdTWq6+vha2lB75p12Lh5CzZt2YKNmzdh05bN2LJtKzZs3oweAwYQwtBNkF9WCmdmJmKTLFgemYBly0xY9pE4rGDJKr9aWadAVivfSnBrIS5C3Vgl1w6AqOUmAQNLxT1dACvoBDBEvgh9415ZmQ87r+/VMEC+m2L/AQp9OgBCYl2EuXYAyCo9V/DjpfR7c/VfOwCUwKeYT0D0CroYlJMhahlBAUFG6Nnq9xkQItwxIHDBcBZEGn8jgQvxiKUDYFkc4pabEBdhgsCAyAQRfAQBWvgJFDAAgHIFEArQ0RCvxKKsXnO1N1VgQFpapojW1PQcZGQXICO3SCozV4GA9KxCZOWWoKzSjQZvCzy+VtTV+1HX0ISm1m50da/FqlXr0Su1DuvWbsKDDz2KP/nTP8Nf//0/4p/+5d/w5a98FZ29a7B282Z86gtfwONf/2PsfugRgQqFReUoL61BT+cafPxjn8JffO8v8T//5d/x4x/+DR568GGUl1bCQhdAoh2JSQ4kmB0wJduQaOaxHeZkJwgDzGYCAAp6p4ABi0W5BXgvBW6y2QaL2SYr+xS5ZqsdVgpcZwrsInSdMlp53uKEJckBuzUVKfZ0pDkzkZmajayMHKQ4U8FrkhItMCdaxGXhsKcjPSMPWdlFyMoqRIozG86UbKSn58pKPmFAWWkFGr0+rF6zBpu3bsa69evR3NKGqmoXsrMLYDWcD2ZLigIc1hQk2QgDUsWhQLFPKOKua8DnPvN5cVD86Ic/xh995WsIBFoQb7IgIcGKxHiLQB+CgfjYZKmkBAtMcUmIjk1ArIlAIBHRsapWxiQi1pQMU7wZCXQ3JNsNVwBhSYpyBoTBAKeDUIDuB7oDCFL475JDQADdACw6A9LojnCqIgxIT0mTykzPECCQlZElMIAgoDA/C90djfjqk4/ghWd/gJtXnsPd6XcAHAbuHjMcAdoFEDYGnQF0BBiuADoCBAhwvI8zYP6oOAMW5o/g7txh3J17Hwuzv8H8zLuYn3kH87NvY3b6EGan38DM1OuYMpwBk5MvCQiYHH9eYMD4yAGM3dmP0dusZzAy9AzuDOzHUP/TGOx7GoM39+PWjafRL+4AOgQO4MaVA7h+6QCuXGA9i8t0CJx7ARfOvIBzAgPoDvglTp14CSeOv4TjR1/C8SMv49jhlw0oQLcAXQMKBhw+/BoOH3lNXAFHBQa8huPH38DJ4wdx4oQqBQKUA0BggOECUGCAAOBQEAacP3kQrAun38T504dkvHTmLegiGBAQcI6i/x0BAoQCAgAuvI0rRgXdABd/JSDg2qV3cZ1OgEu/ljEEAt7H9cvviyPguoCAoyL2b149hpuG6O+/fgysWxT+NxQE6Jf5CfSL8Ffjrb6TuNV/Chx5/la/cgMM9J/BPWXAAAKBIBQYOIeBW4QB5zE0cBFDsrpP4U4hfwEDAgAUBKDIHxoyRD0hgAYCi0CABgCEAnqu7gmJ/5ATgOcIA24TBNy5hpE715e4AvowRiBAR4C4AvoNV8AtjI4SBtzrBqArQEAA3QETqhat+Iet4IfOGy6AyWFM6ApzCWgnwL0jgcCQ4Ri41zlw7/XKFaDdAUGRb0CBcBeA/iz8HOFAEAgsBQE8DoMAwbms9NMJMI4ZWflXDgAl9tVK/9wsIYBRBiAgJAjVpIj4PxQGEBqEw4DFEEBBgvn5acwbK/HBVfoPEL4zc1NhwCB8vlh4h4T7B5w3QEC4G0DPNQQIHxc/TzsDZnF/GKBW97V7QI9LYUC4yKb4VyDgXmeA3Ccg4YN/C0EAV/61wA+f63N6lM8IBBZdT6fA7+MMIAiZw4xR07OEGgQas2GugPvDAAp+DQO0+NfCn8ejU1Pq83BgsMg9MIvJ2TlMzsxhamZe1axyA2goEA4DBAgIDJgTGDA6PQ9VCxiZWsDI5DxuT9IVoEDA8DjdAQsYHF/AwDhhwDz6ZaWfQIBFl0CobtyZx43b86AjgA4BjjdH5tA/ShiwgIGxBXEFiDPg/4pPR4QpFVEmJyLjKPTtWGmyIzrBgRUEAfFWRMVbEWmyYKXRDsBjtgtE8ZwAAbscxyTaEZPkRHQyYUA6Yi1pqqzpMDkyEW1LR6wjAzGOTBAGxNENQADgyEBiajbiCQJSchCdkg1Tep5yAWSyLYAQgK0Bqj2ALQIsOgMEBhAA0BWQVYpYgoHsEiTmliIhpxRJeWVIyiMUKIM5t0IAgAYBltwKmHPLYMkrlzLnlSM5TwGB4EjhT6eAQIEKJBAMGOco+ukCMBcSApQjqaAcBAV0BBAEcLXfZoAAM9sGtDOguEJW/ukICAcBVrYLGO0BdAU4SmvgKKtVMKCsDs4yt5RqE2CLgAtF9V7Utbajec1adKxfj/Y1q+HvaIc74EO1x40abwMqPW5Ue+sNKNCAWsP+7wp4DDCgAABhQEOzF/VNSvwTALDECdDkQ63fi1q/D3VsC/BRqPuCq/8U+iL+CQOaWFz9p5D3wSVwIAAX3QHGvI7tART1tPr7QzCghiK50Wu4AvidykUgq+n+ZtRyVT3QhDqCBn5PGAzwtLbC29GOQGcnWlf1oLm7C56mJlTQYl9WBq/Xh3Vr12HH9p3Yu3cfdu3dg22ygr4JazesQ8+aXnT29qCjtwdtPT1o7e5GU2cnWrq6EWDbAN0BzQoGUOSzXIEW1AWaBWbwXV2BJtSLW6FFnAJ0L9QHWtAQaEa9v0lAgLvRh7p6jzgWqt1uVLlcUuU1tSL8i6qqUVBZhWJCgOpqVVVVKKqoQFFlBYqrKlFeUyMwwdfcLNbm9Rs2YBOBgFEbN23Guo0bsWrNGrS0t6OBLQkuF3IKC2FNSUG0KRkrIpMQFZGIFR+JR8SHTYj4iAnLP6yEMUU1hSqFtBboFPBqrlbvOY+KCLUT8FiXXnXn/VxN5/PYGsBR2/fDr+FcPTtkx1fuA/VdStArdwCfpwBBrFrNFzBAAW9ca4ACXsP7BAxE8rckLqqo5Qlg6RaHxe8Tg5Ur2B6gRr6z/i3696jrFXSIJrSgQ4FQgA4Biv6VSujzPQgEeMx3EShgfMbzcTGJIgy5cswVdIdN2c7FMp+SgZTUbKRl5CM1q1AqLasQBAFpmYXIzCkWGFDvbYXH14bKWi8q6/zwNnWirXMVunrWort7DVpbu9DesQrrNm7DRz/2CXzx8a/g8a98HQ898gmsXrcBW3ftxuNf+xq+9d3v4bNfehxr129CXV0jyktq0FjfhH27H8Z3vv3n+Ol//Bf+7V9/gs9+5gsoK61EXHQSEhNs4gxIsjgRl2RFAp0BbBFIdCAxySZOAbPAgBQR88nyuWobYAuBwACLTdwB8lmyFRarHTabQ4o2eFrirSyLE3ZLGuzWNDisaUi1ZSArLQc5mXlIS02Hw54igMKaxNXwdGRl5CMvrwwFxVUoKq5GRmYhUlJzkZaWi+zMfBTkFaOiohr1DR6s6l2NHTt3YOu2bejtXQOPJ4DCwnI4HBlISnIK8LBYUmGxpcJsoyAPtQmkp2Wiva0TTzz+JH74gx/ie9/9Czz88KMoKi5HTKwZvC8p0QqKf7YsqFLzeBNhQDzi4hNhSkhCrIkOAYKAJKNFwIzEJKu0W0h7AFsUbEZ7gNEqwNYAh81mAABnEAjwPJ0AIv7pBHCkKPHPtgBCgNQ0ZKSmIStNgYDM9EwQBmRlZiI3OxPuulI88tB6/MPffB0nj/wvTI4cBGbeBXAUwEmjFeBCWDtAGBCA4QLQMCB4bMAAOgOC7gA6AxbDALYKzM8oGLAw+yvDGWDAgGkDBky8jMmJEAyYHH8OE6PPYmLkAMY1EBjejzuDT2Oo/+cCBIb6nsbAzadx6/p+9F97RhwCqmVAOQSuXFQw4PL5F3DxLGEA3QEv4MypF3D65Is4efxFnDjKIhBQUOAonQJHXsHRI6/i8OFXDRDwGgQEBGHA6zh54qAqcQQcDLYDBGGAdgmcPITzp97EeZq4UPcAACAASURBVI4EAdIWoNwAF06rloBLZ99CeFH4Xz73Nq6cewdXzr+Dq+dp/38nWNfYEmBAgOsCAd6VdoDrhhPgprQCvK9aAa7Q/s/V/6O4wbp6DH3XjqP/+gkZ6QDov04IcBy3bp7ArRuq6ACgEyAo/IMgQMEAggANAETsGy0Cci4MBPBYgABBwMB5DA4QBFwQGKBX9tWoBL2aEwjodoDLAg14z/DgJQwPcbWfoOCijIvvDbvHaA/QToDwkTCARRgweifUHjBGF8BI/z0wYHRUwYARugPGQ20BAgIEAAwLEAiJ/TD7fxgMuHfFX1n9tYjX9wevE+t/yPLP64LXiBPAaBEwXAFayOvncQwHAVrwi8i/T0vAPc4A7SQIcwgscgcYMECfE3dA0PY/gVkt+I02AGkRCJ6jQyAk+in871e/q02AbQGEAHr8fWBAuPDWQECPi4X4BwjiD4AHv+vepd/7+x5T4M/Nz2J2nkBgaZvAFGb4NxB3QJiLYJYQQR+Hz5VLgG4CtghMz02JI4DzKZ7TbQVG28E9v8lwMnwQAOD5RcUWAaNNgEBAffaHwAAl/tX7ht5vamYGUyLWdZuAggK6PUC7A7RDIAgEphQk4LGUcbz4euUsmJiZxcS0AgIU/gQD4XCA55QbgI4AXUabwMw8RmcWMDKt6s7UAm5PzWM4DAgMiYinmFdtAhT2qlUgBAGCQODOPG4aMIDtAdIiQIDAe8fmBSoMj98F60Mfjk9DpMmBmAQnYhIcsvpPB8DKeBuijKyAlUl2RCWyZcCKZSaLAAKdH0AoEJNgwAAjMyAqySFAgFAgOjkVKy1pWGFNQ7Q9AxHWNAEBbBGIc2bC5MxEQkqWtAtEc5TMgGzEpOdgRVo2ojLysDIjHzFBIFCIhKwiJGaVIEFEf5nkA8TnlIMVm10iRWGflFsm4j4hT+UHiN0/rwKJOQQDCgAk5pTKNbyWwIDggIJecgHymS9QLg4A2vUJBJILK5FMN0Ax5+VSauVfOQKUK0DZ+wkECAmU4KfQN7IBShUoUPfRFVAJAQGl1bCX1YBuAMkHKKuFvawOVh6X18FR5oKjxCXOgNSyWmRWuVHi8aOhsxvt69aji86A3l5421pl5b7W60FNYwMq692oqHehssGNygYXqhvZGtBgZAgoOMA8AbYDsA2A7QA1PrYYMCMgVLUBP1xNAbj0aj2FOlfnWSLQlbBnP7wIdeO6Wj/zBZRLQHIGCAl4fVMzqo0WgRrJDfCjzuuHS1b+FURwNTXJyr/02jepnnuKbXEgcDW+qQW047Mfv7G9A16u5Hd1o6m7G772NrHG55WUoKqmFp2dXdIisGvXbuzdtw+79+3Fzr27pc9+w+aNWLdxPXrXrUHP2tXoWr0aHb29aOvpRntPj7QPNHV0SOtAY6vREkBHgFj++Tdh2wIhhfHbBIo0S3uDZCJ4/ahtZLaCF+5GL9yeRtQ3NsLl8aCOvdr19aiuq0NFTS2KKyn8WZUi/OkGKK6sFBhQWF6OEsKA6ipUu2rRGPCjq6cH6zdsxGa2Cmzegg2bNgkIWLt+A7pW9UrLhKuxUdwFaTm5SLA5sCImCRErEgUGEABQpHPFnavktP9HfDgGXDWPWsZVf875eSxWLItC1HIDBixbKcc8t2JZKANAAwE98rm6RYC5AXQLUEiztOOAI0W2CGxDzOtreJ6lMgLi5Fnh11G0r1xB0a6Eu76e36uAAF0BBAMhGBATmRR2HNZKIOCC77YSkcuipKKWr5Rna9hAQc/nqhaEeEQ+YEIUWw74N6Sjgn/HB2IVhDBAiHYH6F5xgQMGMCAcYP84LePJCbSCp8Bu4So3LfMZcKRkwerMhj0tF46MfNgz8uHMyEdadhHyiqtQ5WYuRxvqvK0oJwxwBRBo60F371qsWbcRvWs3oL1zFZrbOtHa0YO1GzZh2849ePDhR7Fzzz5s2rodux98CE989Wv479/9c3zjT7+FT3zyU+ju6kV9nRd1NQ3YtmUXvvOd7+Oppw7gP//jZ/jcZ7+E4qJyJMRZkZToMNoEHIhPVuJfMgSSQjAgiefpAqCTINkuPfA8Nlt4bEGy2SIAQF3DvwFdAA5Yktkjb5SVeQqpsJpV2c2pcJjZ656NzPQcpKdmiqtCWhLMDrDNooC5CsVVKK+sR2V1g4CB1NRc5RbIIigoQmVFNRo8PvSsWo2du3Zh1+492LxlGzrae1BTXY+01GyBAcnJdDakwmpJAa36NmYXWFNEpJeXVWH7tp14/MtP4Fvf/BYe//KTWL16nbQZxJksEFdBog1J8RZpF0hOJAgwS8XHG60BcQmIM7ESBQzEJyQhIYkgwAy2UhCQCBAxwIhAEitbAwgClAsgxeaQvACKfskOYMsA3QHMYWCOgLQI8G9mVFoaMpgTQBiQmo4swoB0tl6ko7QoD2t7m/Bn3/gUXn3+r9F35XnMTb5lZAUQBHDFny0AHwQDdE6AHjUcIAwwQIAeF0KZAdoZQBCwwArmBryFuZk3MTd9UGUGTL+GqalXJDNgauKXmJp4HoQBU+O/wOToAYyPPKMcAsNPY2ToadwZ3I/bAwoK0CHA/IBb1wkD6A5gu8DTuHZpP66KQ+BZXDr/C1w8/xwuSIbA8zhz6jmcPvk8Tp34pQCBk8eYIaCgwLGjL+EYnQJHX8WRo6/i6FG2B3B8HceOv4Fjx+kMeA0nj7+BUyeM1oBTb+LsqUPBOnPqEFg8d+7UIZw//aY4AC6cOgTWRToBDAAQPmdLACEASwGAdyUDQAl/2v/fxVWWtAK8ixuXfo2bl9kOwGIWwGHcvHIYfez9l1IuANr+teCn6O+j+L9+UoCAcgPQ/k/rv2oDGKDw76PoZ/9/SPTLcf9ptdJPGHCLZYj9W2dVPoC0BfBc6PzQwDmBAIQBA+IKIAwItQXQFaBF/dAgHQPhYECJ/uHBi7g9RBhAEKBqePgyBof0tWFOgrCsAOUEMDICDAgwPEwYcB137tyAzgcIugGMtgCVExDKBgiu/o8PqVYBjrqM3n0t1NWohb4CA0GBH2bnn5gcwvjkECbCzoULeZnfBwioaxbnA1D0L71XQIAGAkZ2gAYBS0deu/TcPce/xR1AZ8BcGAgIrvwLCGAuAN0C4YDgD4MBcwuLRb8AgIUp8Hx4fTAMmMbd+WnpcaczILzYMiBuASNHYKkAFvv8/08AwGdp0a9zA8LP6c8+cDQs+fx8dmEGM6z5aWNUbQM8Vu+8WPQHYYABBsQRMDON6Rm2BOgsAQUEgjBAIIHRPvBbfjP/Xmy3WFSSB8BMgMWlYYCGBEszA5gfoDMDCD0EfAjIYJuAKnEEaGfA7CymglkB4fZ+BQbGp0L2f5nzOFgzGJ8ySloHZtWxkRmgRP1sUNxPMBdAgIByBSgoYOQFBAGAAgFj08oVIG0ChjPgztS8OAM4Dk/OCQxgqwAzA1SLgBLz/aNqlb9vNOQKCJ9rKMBzfWML4Ng/fhe3xu+Ks2B4EmDdmQQ+FBGfihWxNkTRDRDvQLTJJqv9BAKEAZHxdqxIIAiwIcJkVSCAzgDjOgUDbBBXQKId0axkB1YmM0QwBTEWwoBURFqZF5CBlfZ0RNMVYIQHqtaALGgQEJeWAxPzAliZeYjJzEd0Rr7kBsSxVUDcAQQCxYjPLkF8TinipDWgDPG5zAZQAYICAgwYEJ9bBlNuqdECQJdAKZIIBAzHgIYAiTwWGFBptAWUIylfr/YrGMA2ADoF6AhgWwDbA+gAYFggQQChAUGBygswXAPSBqBgAN0BbBHg/TozQFoK6AhgRkAp8wFURoC9VMEAG6GAAQOkVcAIEMyp8aDC3wLfqtXoWL8BHevWobm7E54W9th7RPDTHVDlqRcYUO6qQ7mrBlUEAh53yCHAHAFvvfT+Sw5AsCXAj7omhvT5BQzUNvkl+I6r39q+T1u8CGE5F+r/rzNEMq9jC0Ctl24ClSnAVX0CgloJ0fMLEGBQIHMBXL4A3H6Ka+U8qKOToFkBB67AM3yvvqlFioDA3cTQvnY0MMBPYECnwAAGALI9oby2FsUVFWj0+bBmzVps37Yde/bswb4H92HPg3uxZ98e7Ni9Q0L32HO/btMGrNlAKLAOq9auRXfvanT19qJj1aogFOCz/e38O9MZwP5/5V7g34LzWgIOrw8EHAxErKpvRHVDI2obG6VVwuPzwev3w9/cBF8ggEa/T97P7fGgtr4eZXQEiPgvFydAUVWFAgFlZSgqK0NppYIBNa46NPq96OntFRCwbft2GTds3ASCAP6Gjp4eaZWobfSgsKICzswsxCRb8UBUPD7yYYpeJZTVij3n2vKvPiMY0KI+clk0IpdFilCm+F/+4UhELicQiBQooD7nNar0fXwmYQIFvD4XchmEr+4bMIDXhvX0CwgIugFCYYMU40qQ83oGH/JZCirwHg0TOLI9IHpFEqIk7DAEBXSbgOQfLFMOBv4touVZhAsEAdGIiYpBtH628VsEYAhkUO0DGlgEHQl8P+O9tRuA9nAKf+0UYI4Ai8f8LNHE1WO1qi6r0NY0WG0ZsDmyYE/NgTMzH046BLKLkFNYgeIKN2rqm1Db2ILK+iYUVzeizOVHU+dq9G7YhA1bt2Pjtu2SK9G5arVqCdi0BVt37cXuBx/Bzj0PYcv23di+50E89rkv4mt/8i1840//O77yR1/Hww9/HGt6N6KmpgG9vRvwp9/8Nn7606fwb//6U3z6sc+jmG6oeFr+lX2ezoAEsf2rvADmBogzgGGCBgzgyFVuEf10CJhtSEi2ID7RjIQki3wmvfEWugDsSOaKeDKD86ywWVSbAMW4xZwi0MRmZt97pgj/9LQsCfJjNoHTkY6cnEKw1aGktAZVNR643H4UFFQEnQFZWQXiDBAYUO9FV/cqbN+xE/sefAi7d++VrISmQBtyc4oEzPCfB2GAzZIidn07YQC/y5kGv68ZH33wEXz5S4/jycefxEP7Pop6twfJbJ2I56q+ciww70AVf5MF5iQzkhLNAkfoDIhPTIJJHAJ0CSQiISlZchCSLVaYjSIQYKaCygpQYYBa6DM4MI1OALYDOFUxHyAtJU3yATjSEUAAkCEgQLkDKP7pDsjJzEJedg6K83Pgb6zGpz+xDT/552/izJGfYmL4dWDu1wB0e4AOB1w6hrsDCALuAwMYPKhBgIwMEmRmwBEsMEBQWgSYGfAeFmYYIvgu5mffEXcAYcDszBvSJjA1+QomJ17E1MQLAgMIAhbBALYKDP8cI8OEAT/H8K2nMNTPYsuAbhf4OfqvPY2+q0/jxpX9CghcPAA6BC6dZ7Fl4HmcO/Mczp5i6QwBhgqqHIHjx14CgcDxY6/g2LFXcewoXQGv4ZhkBbyuQMCJ1wUEBAMCg8L/IM6eOogzp96QOnuKIYFvgA4AcQEwG+DMm7jECroBQrkAQTfAOboAfqX6/y8wC+BXkgHANgAJAWQ7gJELQBfATToCrhyWYMC+K0fQT/u/LqMFQNn+j6uVf/b73zwlNWDMVRggz58AYcBAGATQDgC96i85AAIFTmMozAVA0a8zAggJeKxLZwDQGaDaBC6I6Bfhb8AAtg3wWAl+AwIMqWOCgBAMMD4bVi6BQcNFwLaCUHuABgCqLUC7Ae7cMSAAAwLv3DRCAlU7AAFAqD3gFkYlJ2AQo2wPMNoBCAAY4idjmLVfgwAl+rVQZ0+/tvPrc+GinSBgGJNT+tzilf6l4n7xsX6euoer/os/Vy0CWtBr14A+/oNHwx2gXQAyhrUJ0BUQggE6E4CjAgGhz8JbBJQbgKv/v63uEf4SELgYAmggIDkBRojgYjBAGDAjRQG7CAZwtdsAATy/FAbo48VtA0qA3++cvv6+Y1h2wAcCAN3GYIAAimsNAwgEglBAwICCA7Py3spBoIX1IhgQJv7DQYCEEoorQDkD6A7QxXyB+/6GsL9V+N9RQwAt+j94XOwM+G0wYG5+4b4BgswMULkBuk0gNDILYGJKVQgCaCAQBgOmCAJCMCC0uq9ggAQDMg9AuwP0aLgE+DnvGZueBUEAgwMlPJCZAYQBUyzVIjASBgPYKkAYMGjUwNg8Bmj3pzNAsgOUM4AuASmeC4ME/QQBowsCAgYngKEJBQJuEwZMAR9ayV0EYrlTgB0r4+yIjXMgxkQ4YEVkAgMF7YhIsAkUIDAQ14DsLMC5TQIEmRcQhAFJdsSYnYgyOxBlcSLamoKV1lTEcFcBe4a0BMjcoXYSYKtAjJOOgBzEpuZKe4ApPVd2EmBYoCq1iwDdATEEAnQGZJdIG4BJgECJQABTbhnicktF+LNFgCI/Ob9cjgkEmAPAlX9pHzCcAHJNHh0AlUjMq0B8XpmAgARexxIYwB0AQs4AOgSssoNAldqFoLBccgNE1Bs7B3DOYnsAHQDyGR0ARpZAeLaAXCswoAbWkhrYig0gUFoLG6usFo5yFxwMD+RYWou0CjcK3H7Utnaiac06dGzYiPa1axHoZC87E/gbRPBXedyoaKhDmbsWpa4aVNbXqfaBRhdqvPUqANDrQV1jg5SEAUougBLjNQEfalm0+xtggKv6FMFcnacwZwgg5zzHnn4R/wYE4FyOCQMMIMDWAT5PgEBYm4DY7PksOg4CtNwbToQmPpsJ/Lovv0ms9+zZZ4AfE/01CPB1dCLQ3gkvg/o8HpRVVcHV0ICOri5s3LgRu3buwJ49u7H3wb3Y++Bu7Nm3C3v27sLO3TsldG+zhPApiz1X29k/vGbtOvSuWYNVa9aia/UatPX0oqV7FfhdzCsg8FAQg2DAj5pGtmh4UeluQEVdA6rdHtR5vGjwB0Bbf6C5CS2tLWhrb5NqbWtFc1srfM1NAjBqGupRUVeNkkrCgDIUVpWjhO0BdAWUV6CsshJllVUgDPD6vGDw2bbtO7Bj5y6BAXzv1QbMIMTwtrag0u1GdmExLClpiDIlI2IF0/0pdpUAVsKZK9rxYf3/RkighAWy958VhagItWpOIMBzAgMeWIHI5VEinAkMKKAJBSj+FWgIBfWFQwHOtdjX76LBAcW2OBaMMEB+zuv1OVmdN94/3MLP60LP0vfwd+q2gERjHq92FZDsAkIGfq7ABTMLVJtAFKIjoxEdGYPoyBBo0N/xQSPfkQJf7ySgRH9SMEBOkuSZJm+AgbhonS3ApHkrEo0+fK4oW63psNmz4EzLA1sEMnJLkFVQjsIKFypqfahpaEF1QzNKa/0orGpEab0f/u5e9NIpsmsXtu3di007dmDjjh3YumcvPvG5L+Dr3/o2vvmd7+OPv/kdfPGJP8YnPvtlPPaFJ/Glr3wT3/r2X+Ef//nf8Y//9G948slvoNblQ1NLN5548uv4h3/4F/z4R3+HB/c9grycImkFoDDne8puAswBMDNQUIEAscMLCKADQLkDxPJucYCtA8wXYFtBQpI1CAkUFDCDApgr4hTPzBfgij/zB3ifVLJdznMXAuYrZKRnyy4M7OFPTc1CXl4JiksqUVRcifIKF2prvcjPLxcYkJGeL20CxQWlqK6oQUN9I9rbO+W/o48+/Ageeuhh7Nn9ENau3oiy0mqx+WsYQOcGd33g+7Dycguxds16PPbJTwsM+NRjn8K6NetQUFCE2DjuBEBHhBMWZicY76xGggELkpIYemgNugAYeki3BMMQ+fv5d7BYbTBbbTJaucOCzS47LRACaBDA1f+0VCX2CQRkhwAKfwYEpqQJEJDWAGeqCH+6AVR7AMFABjJT05GXnY2Swjw0uiuwfVMH/uI7n8dbr/4Dhq8/j7tTb6usgGB7wCUAF8NaBO4HBX4bDAgDAtxVgDsJGDBAZQYYMGCW7gAjN2DmraAzgJkBhAFTky9jZvJFzEy8gGk6A8aeFWfABN0Bd57BKJ0Bwz/H7cGfCRC4PcB2gZ9j4OZTGLz5FAau/wy3rj2Fvqs/x80rP8f1yz/H1UuEAtxh4FlcuvALXDj3LM6ffRbnTv8C57nLwEm2DbyIU2wbOMF6GSeOs14RIHDi2Gs4fux1nGAdZ3sAQcAbKiDw5EFIQCCDAE+zBeB1nDv1Os5KvYZzp17D+VOvyS4BEhIYBAFvSgaACgJ8R2UDSEvAr8QRcO38r3DdCAK8flE5ANTq/3tgKwChAAMCb155D31X30ffVeUG6Lt2FP3XjuKWXvkXy79h/zdaAAZunsLAzdNSgxT8YfPBvlOQ6j+FwfA2gP4zGGL4X394ICDPncbwrbMYvnVOxqFbSvwPDp4Da2iQbQH6nFr957nhQVr+Ly4qZggM09ovWQHGyv8Q3QAXMCyjggEEAnQG0BUQHgx4PxCg8wEWgwAFA+4YIEDtGBAGAwgEuFvA6IDAgNFxggBdHwwBgjAgmOhvhPzpsD8Zl4r9+12jwIBe1V8q8EPHfJa+fzi4Y0Doc+M5uh3gfs6AMPv/74QDS10BS0BACAaEi//7zQkIFrsCfp9WAC32/5Dxd8EALcbDBa+IbmNFnEJfi32ZzypLPZ0CwVqUK6BX6EMj79Pfo0d+n57/tlGLaw0D5NqlMMAAArqNQK2sh0L5CAQo/meNnQU46rnKFZhWWQRBCKBEtrQM/BZnwP3eW78vIcDijADdHqDPKxhw/9yApc6A++8moGAAbfvGrgASADiDSY5T08EiFAgBgSmMTU2F8gK0Q4CjCHqKelUCBgxYMEHXgFHjFP1LHAESGsjdAwwIEBwFBsxLXoDKDJjD0MScCg/kbgJjC8EaDAKBBfSPsAgH7orovzlqwAENAUbV7gED43cxNHEXtycgRVfACGFAjMmJlbFc6bcj2mRHTDwdAjasiLNguckqIIAwgPkBckxIIHkBykEgICDBgdhElh1sKVhpcSLS7MBKAwQQBsQyL8DG7IAMgQIMDdRbCxIIxKbmCBCQrADuHmBkBTAvgFsKxjM4MKsgCAPYIkAQwHyAhBzVKkAYwKLw59aCLK7s0xVAUS8BgBT7RjsARwICtgRIroAh/rljgA4NFBhQqGCAtahaVv8p5OkEsBUugQEllbAQBoSHBNIVEIQBVaHtAyVTQG1DaC+phrWkGmZuS0jxbzgDKPqtRhEGOMtdBgyoQXqlC8WeANyd3bKdYNemTWhb0wtfe4v0+GsYUN1Yj/J6goBqlLtrRfB7Al54mmgtboTL64GrsQFujoQCHHmeYt3nRY0h3LlC75IMAOYAhEQ5WwRkddwQ9bT9i/XfH0CV16dW/bkVoNdrVKM8t9rH/AE6D5ple0ANELi6Li0A0mpAIKD68BV8UC4EXsM+fDd78Znu39quYEB7J3x0B7Cvn+GD7noBAc1tbVi7bj22bduG3bt2Yvee3dizdw/27OW4G7v37sauPbtkO75tO3dgy/Zt2Lh5s9jtucquoMAGrF2/HqvXrUc38xl6V6Olu0d2MajnO/u4VWKTbNNWRxjQ0IiKunpU1tXD5fHJO3GHgtbOTrR3dqCzq1Oqq7sLXd2d6OrpQltXBwKEAi1N8s+krKYKrCJCgXJVhWVlKKEzoKZG2groMFi9Zi127NyJXbt3Y8vWbVhHV8CatehevQbtq1bB00yhWIPU7FwkWB2Iik1G5AolhClm2Rqg2gEIAlh0B6iVfFrjV0YwG4CinxAgWuYi9HWbwAMrEPGRSKx4gKvoscpivzxKjsUJIE6BlYhaHi3P4HNYAhKM3QPoBKCDgGJfevwp6GWbQY5q5V2txIcAQQgA8ByhA90BBBxq20H5bdwe0YAK/E0qIyBRHAIEH9zGkMKduyJEM0OBx7plYXkMIj6yAlERhBwrBQaIY0G2XAyBAQp+npfnGO/Pc3w/jjonQLsAtEtAj4QGJlZUAuJXJiEx1oIEkxWJCQzhIwxIg82egVQG4eUWI7e4AgVlNSipaUCl249qTwvK3QHkV9Yjt8KNsoYm+LpXo2fzFmzeuw87H3kEex59FB997NP49JefwF/93T/ixTfewtvvHcfBd97HL156Hf/6n/vxvb/+H/jC17+DH/zTT3Hm8k3cuDWCA8+9gkBrD6pdPjzy6Gfwp9/8Lr721W9i7ZrNyMzIkxV6imS2BUjSvmQAsG2AIYLcEtCKZNlmkGI/BAO0U4A7DyQYn6sWAuUcECCQzNA8m/Tac1s9fq4yBdheEAYErE6kyHaB2UhLzZQwP4EB+aUoLqlGPsFJYSVKS2uRnV2M1JQcZKTnIYfOgNxiVJbXoN7dKKGBm7ZuxUcfeQSPPPpxfPYzn8dD+x6Gx+1VbgC2KBDOMMTQCPPjrgZ0AOzb8xC+9MXHJTNg9649aKj3yBaGDP9juGJSkmp5oMOBAMDCXAQ6HpLpDlBAIJkAIMks59g2sQgC2OxBIKBaBdgewBYAw/ovq/0Z4E4ADAKksM9Oz1TWf676p2cgOzMTOVIZyM3MQF4WjzOQnZGO7Mx0ZKQ4kJ+dDld1ETas8eOrj+/D/v/6Li6eeRpTd14HZn+zxBWg2wPoBFgKAnjM8+EwIHzOLQnDYYBqE5DdBBYFCBIIhGCAtAnMHJQAwWljR4GpyZcwPflLzEyGwwAFBCaZHSDuALYKPIWRIUIB5RAY7FMwYPDGz3Dr+s/Qd1UDgadxXbcMcIeBCwdwydhl4MKZXxjbDhq7DJz6peQInD75sgCBkydewckTr+LEcVWnBAK8jjNc+T95UHYIUC4A5QbgzgDnTr2Bc6d1KTBw/vQb4gZQjgDVHiBbAuodASQb4G1ckVyAdwUGEARw5V+JfrYC/Bp9l99TDgC6AAgDLr+Hvivvo//qYfRfOwwBAQz9u65W//sJAm6eBFf+BQCI5f+UrPgP9p0Ba4j9/CL0w8fT6nyYzV+HAKoxtNpPV8Bw+Or/rbMCAAQCDJ5Xc35OKGCEAw4NhMEACnujLYDj7aHLRiaAWvGnQ+D2EhAg7oBhwgC9QwCvDTkCdEigBgEMClRugOsYGbkhpdsD7g8C+tX2gUZYIEMDdTuAzguQ7f0M+z4hAN0AU+HHQeEfvnp/73xqyuFtEgAAIABJREFUcghTUxTyLK7kL97eT1v/F6/6q+foexUQ0M/WDoPQqB0Belwk+mWrwMXbDYbvHiDXakeAzgdYtIPAGGZnjFq0PeD9IIA+Z8AAIztAhwRqZ8Ds/ATCS7YIXNIKcD8gsNQRoI9DIYLKGaBdAeFiNhwGhM+Dgp/i3+itX3TOOB9+z/3m4d/1e83DWgMEBCyorQdD985idoGlXAJM99dugKWjhgEhm32oPSAICeZnZUcC7QiYmuOx2nlA/57g79fww8gOCL2T2mGA7xsOA5a6AxQkYKDgvIQIaiAQem8DBjAjIaxVIPT+s5JroDID2BZgZAUYMEB2FDBcAYvdATMYm5rG6GQoPHBsiueUU2BsKgwETKutBpVrQOUGEAbI9oMaBOjjaeUcICSYCHcGTM1hlDU5h5HJOdyRAMG5YIDg0JiCAYOj85Bi3z8zBLjiLyBABQNylwG6ALjTgLgBRu/KzgMMDGT4YBAGGK4AgQGmBCdi6QSIpbhXvf+0/hMGLIuzGDkBhAJWLI9XI0MFeU2wRcCAAXGSFaAcAXQFrLRoV0AaZBcBW7o4BGLtGRIkGGvsHmBKzUZsahaiJS8gV3YQUFsIqvDA+Cy2BRSCY1xWIUzZxbK6H59TgpisYgkPNOWUITanVIowICGXGQJlsrpPt4Be8afol1BBwxnATABWOAxgLoACAio8UAcImotUZgCDAs3MDSAUYJsAV/8lR6AS5uIK6f/nar+jpBoOtgVIkKByBbBFwFFMKFBtfF4Dh4j/GlgECoRtI1jukswAW1md0SbA3IA6CRbMqqlHub8FjT2r0LFpI7o3bUTLKopTWtUbJTiw2lMvOQFl7jqUsT2g3gVvUwAt7W1o7WiDv6UJjU1+eLgzQGODCFDCAN7vMkICCQR0ccWeNngNA5gdwBR9HaAnIICp9T5VlQYMoGWeMICAgdvpsaq9jajxqYDAar8fNWE5BPV0GfhDGQM8pvuA3ycuBMOJQBGuYEAbvAz4oyOghUFqfrgbPLJdWEtbu6zqs59+165d2LN7lzgDCAN2s7id2u5d2GnAAG7Jt23HNmzbvhWbJZ2fUGCzwIH16wkENggQYEp/Z+9qNLV3orGpFV5ub9jUCg9BSaMPVS6CABdqXPXwNTWjvatbWg26Vveip5fBbl0KCnR3orO7E92rutDd24227g60d3eiqa0F7kYPqt0uEf+EACyGCAoMqK1FtcsFb6AJqxmKuHMXdu3Zg63btss79qxeI5kHLT3d4rDgloK29AzEJFkREZWICCboM1yPgpswYHmCuAIokJU7QFvmCQMosg0hr8U7tyOkoI/geQp/5QKQVX+K/+UrxbrP4L3lH14h7QXack8HAe8R4c52AD4zmEugQgJ1PgBX62XFPswloAAGoYNyFfA7+C58T+VOCLUeaMu+DgCULRAfWJwfQBgirQyy0wA/U84CBRvoCCBgMNoQDFAQej8VUMhrCQMIP+TvargTFgl+psNzq0FuO0gnANsDpE0gSWBAfGQCElYmIiGa+QFWseAnJ9jVqrQtDakZOcgpKEFReTVK+d9/XSMq6v0oc/tQXOtFXqUbWeV1KKjzwtPZi07+e0sY8OjH8ejnv4DPf/Xr+JNvfw/7f/kyrvQPYmh8Gnem+P9UpnDh5jCefePX+NL/9yP85PlDmIH63/WBEazbsgvFFS5s2rIPH3v089j34Cfh87cjLT0XVns6zNZUyQwwW7i1X7gDwAYzBXySTa18M0DPyAygS4AOAVZCokWF6xnXKWigsgUIAOQa7RwwM5MgBAMIBwgWGLbINgFWakoG0tKykV9QhoLCCuTmliInp0SgQGZGgcCAzPR85OUUoyC/FOVl1XC5PAg0tch/6x/92MfwyU99Gl/76h/jiS89iVWdvXDaCAKcAiPoTrCY7bI7QlpKBtrbuvCJRx/Dk098FV/+0hNYu2Yd8vMKBV7EJ1gMlwTBDgEAQYBFtknkyDYBbpkoLQM8Nj4385zFBgshgDgBHDLyHHdaUG0CKihQHAEpaQICcrJzkJOVjeyMLOQYVZCTg8rSEjTU1SDQ6EazV1XAUwuPqwqumjK4qstQXZYPd1UBVnc34HOPbcI///1Xcfy9f8fIwCuYn9JZAceXZAXoloDfBQM0CODI7IDTCgYEgYBqE1DugKPB3QT0jgILM+9iYZbbC6rMANlRYPJ1KCDwCqYnX8T05AuYmXgO02wVGHsWU6MHMHnnGUzc2Y+x28odQBhwZ/ApDN/6GYb6foZhtgzc/BkGbvwM/defQt+1p6Rl4AYdApeexvVLz+DqxWdw5cIzuHzuAC6epUPgOZw/y7YBFSwYbBs4+TJOsQQIvIJTJ1/FmZOv48zJN6QNgBBAF+EA5wID6A6QegOEAJxfOMttAkMZASoc0Nga8OxbuHruLVw7/47REqByAbg1YBAGXP6NwID+K++h/8r7AgAIAdgeQEdA/7UjuHXtiLEbwAkR/xICKHZ/Y6W/77Ra1Rfxf1ZW+fVKP0e1ss/V/VBpe/89I0X+wDkMGyOFvhwP0fZPoa8gwKAxDhvnhwQGMA/gPOQcAwENGMC8AAUDdEAghb7KB7g9fBl3gnUJtwUEKFcABb8CAQoGEBDcvh1qC9AQgKMGAWpU7QEaBoyNagDAoEDOQzsHhMMADQWCLgANAthvb/TmS1tAEAaERLlasado16v594IACnYKcC3cxR0QfixzhgKq54RAwrCc433hzgD9vEUAQIcCho8U/DzWTgHDBRC+naDMCQRo+58bN7YSJAjgPCTwuYsAr7lfSavAnHIFaPEfHhrIrQfDQQDnfwgMCAn/0PaCoXMGDKDlfom41oL3fuM94j/cFWDM73df+LmQYP7DHQGLXAG6fcDoqw8994NhwL3990pk61YBCm6G803NLm4T4DnuXhD+O5bOF3//B8OApYDg7oKCARoISJtAcItBBQNC762cDUFwwZ0QZqZBGMCtAMNbBSQ8kDkAS9wA45NTkgtA4T9KIGC4A0aDMMAQ/zOzAgeUC4DiPuQIYKuAdgRMzLIN4F5gMD5ltAnQJTA1LxUOAxQQ4G4CIUcA3QEaCOg5WwaYISDBgmPcaYAAQJfaOYAgQGDA+F2wPYAQQNeHog0ngIAAow1AdgkwdhFYmcjMAAeW0xlgwACGCDJgkDAgvEWAzgC2CNAVsCLoDEhBtC0VUfZURNnSsJJAgO4AtgY4uJVgjiruJsDtBFNzkZBRgAS6AbIKJTgwNqsArJhMbiWodhEItgeIM8AID8xRzgDtDmBwIEU+cwXoAkjMU4GC2hlACKDnzAqgC4DF3QLijWOCAMIB5gHIvCAsG6CwQtoE1DUqKFC7AsT6b+QDMFOAQYICCEprpMVA5QJUCxRg0KBdwgYZJlgNe2ktnKW1SCk12gIIAOgMqHALDGDAYK7Lg+rWdgRoXd+8GR0b1iPQ04X6Fqb0e1Ht9aDK04DKhnpUNTSg0uVGXYMHre0dkprdw60IOztEdPqa/Gjwe1HPnQPoCgiorQOZ/u8Se3+jCr7jsY9hgCoxn2BA7wRQ4w0oF0AYCBAoQCDQGHIF1DQy1JB5Bo2yI4G4DwgFAswj4O4Cxg4FdCIY2xHW+/2oJwjg6jv78yVXQL2Dp7kV3rZ2CQv0trbCEwjA4/XB6/OhuaUZPat7sXHLJmzfsT0EAwgEgo6A3di5a6fUjl202u+Qa7dv34atWw0gsMVI6d+0WVwC6zduxJr1G2TlvbWjG/4WgpV2BFo74GeYYaMfVXUuVNXWSVBgc1s7OletkmIwYVtXlzgA/K0tCLS1obm9He1dHQoK9HYJGOjq6URTSwAenwcVNdWSFVBQUooSbitYWYnK2lrUut3wt7TIu2zbuRM7GXy2bTvWbNiA7rVr0da7Cv7ODtR4G5FbVoZ4Zwr+W2wC/m+K5+WxYAJ+LG3xD6hV7ZgIE6K5Qi49/mqVXgL/HqAQVkJX9/zrUaz0y2Kw7L9xpV9tBahEOlfOtbuAQXzMFYg0Vu95nj34sYhZHo3oB6Kw8oEoREeEC3x+n3ILaMdAEAIY2w0Gj5er7QfFlSCtCrGyUi/C3AgXZGsDwYVyOhiuA9lakPkBoZ5//gYWn83310XngYIDxu4BxtaFsuOCnkcaWyBGxIngp+jXWwjyebxWwwGOOkyQrQLx0YlIpDuAYYLRhANmxMdakJRAq7wDybYUONOzUFBSLm6T6ga2ovhR7vahsKYB+dUNKKj2IK+qAfk1XtS2dKFp9Xqs2bEbOx55FI99+XH80bf+DN//27/HG+/+GncmpzEPYAHAXQCTAN49cxXf/Luf4oX3KPDU/3jNro89hpySGrR3bkBH10YEmntRxv9blJINsy1DwQDp/2cGwGIYQGcAU/SV8FdbDkqAYKIFicm0x1MsGy4CAQWhTAFuR0iYIHDAEP3xyRYkinWeWxKqPAGONpsT6WnZUnQHpKfnICevGDn5JcjOKRYYQCDA8MBUZw6yCAOyi1FcUI7KilrU1TUg0NSK9Rs346OPfAyf+czn8Gff+ja+++3vYe+ufcjOzJWtAQkf6Eqw2phb4EBWZg56V60VGPDlLz6Bz3zm8/AHWmC3pwkEkNYI4x4JApSMgGQJDtQwgNsqqi0W+c/aAouFsMOGZAvdAE7ZOSDohGCoogQIquDAFCMPID2Nq/tZKMjPV5WXh9zsbJQWFsBX78L63k48uHszPvWxXfjCY3vxhU/uwqc/thWP7luPj+5eg307erFrcxse3NGBxz+7FX//oy/inTf+Frf7X8QC2wPmuIMAswJ0cKCGABzvBwKWOgOWwgDDGUAYoIEAWwUYJMh2AWNrQcKAu3Pv4e7Mu7g78zbmp9/E/PQh1SrA7QUnXsHMFOtFzEzRHfC8AgFjz2J69ACmRvZj4s7T98CA2wMEAaoG+/4Lgzd/hsEbT2GAMODqU9IuwEDBG5f2KyBwYT+unj+Ay+dVu4BuGTh7+nnZevD86Rdx9vTLOHP6FZw5RQgQXq+BOQCLS7UFsD1A5QOodoELpw/i4hmCgFA+gAYBqj3gLVw79zauX3gH1y/8CjfCAICGAcFWAIKAq3QBvK9cAAIBjuKWtAQcwwB3Arh+3HABqL5/2Qaw7xQGwu3+0t/Prf3OYag/VOEQIHyln8L+ttQF3JY0f2Xtv81V/EEl/jUAEDu/AQMIAgYkNPCcsvkLGLhgCHw6AIwwwGBGAJ97QWUCMAfAyAIgLFAggKNRt7k94L0wYDgMAmhXgAYAGgro49HRmxgd7QvmBYTDgN8GAggB7pcVoMMB9Up+SPBTtBt2fbHpU8gPLapp7QYwYIKAACPMT7cKhIt8JfAVECAM+J1CP1z0L5kv6v8PAwDhEGDRNcFcAEPsiytAwQANBGRLwbkxzCyp2TkFEdT2gffbOWBKtgUMX/W/JytgiUNAr/4vbge4PwgIBt0Z4XbhQCBc5P4+4v+Drgl/zqL5fVbRtZCmUBbBrwFFWE6A/kw+D4KApS4BfRxqDQitsqtzaoVdr7SHRpUJYGzVZ7QJEAKEwgRD7Q6Lfk9Y+4D+HRz1+y5yBshuAovdAveDAQwVVO8dggG65YHvr2BACAxoGEAngHIHzIIwYPweGBDWJmBsKai3FSQYUM4AJewJB7QbQI+EANoVoGGAGlUuwJgIf4r/UNERoGDAAkYnQ20CdyYXpEXg9oRK/ddtAoQBwfmYagGQLQPpEgjWXQyM3sXgGDA4qrYl1LsH3J68q0DANDDKNoHI/83bW8bJWd7t3/8X912IbZL13dmZdffdWXd3d0+QhGCF0lJaSoECpS1SHAoUtyJBg1twCcEJSYi7rbsdz+f4ndc5M5ts6N37/zzPi/NzXnPNtbMCld/3PET8/6wJtBhtAob839UHy4zawCVurBm0YAntApIfoN6T993MYg8gCHDz8oWLF5sEfAUKOJv8ZXcxBwgQWOYbJE0Cy4x6QWc/BQDcAsLhGRgBr6AoeARFwTskRpZnSIzYA5xDoiQ4UPICWCtohAcyN8AjjGGAzAFQQMA1PAHutAlEqtBAgQG0BVD6b7QKuEUkSFAgX8s9AgO+ZzQJ0CLAAV9XCNIWIE0C0WrXQYFUA1AhQKWA1ArGWGFJYHigDgdUtgAGBTIwkKGCIv2PS4MPVzwX8weU7YBqAYIAtgYwKJBLGgR4zf/znZQJizUNQSlZiM0tRFZVNUoYEtfWhvLmJhRUVSqvPcP5CvINGJCDlJxcpOfkIr+oBNU1tWhtawOr6OpYpVdbibLKMhRy8CwqQI4sDt8FYDd9Vn4+svPpdy9ENqsBuVPCz5N8OfFXwz7D8tKZF5CvbAK0CCTnE0rQbsBwQKUOEFWADQaoikJmA6gMAWVN0LWFkjHA0D0m8AsYIAwoRnZhCXKLS5BHFQBbBMrKUCDy+hLkFxejsKhIvPh19bVoaWuRcEAO/KeffjrOMBYl9SvPOB0rTj8NdgiwAitXrsSKFSvQ09OD7p5udHZ3ob2zU1QCHe0doG2AMnzCAKoDyqpqUFxWidKKanVdWoHc3AKkpWeKTaGwpASVNUx2b0BlbR0KyyuQw1rF3DykZucgLYd5DXnILylGUWkxSstLBQpU11WhrKJUgEBGThbik1iPFicwwJqaKhYBthAUEQY0t6CrpwddK1agtaMDjS0tqCUMqGOuQQWSsrMQFBWFpSYf/NcyN5zi5AonDrALFAxwFjm+C5bypF1O6Y2sACPxXw/+sp/C+kB7HgBT8zn8Oy4OvpTa8x5P5DmEU2rPU3teS9DfIg76y7B8kROWLVyMpQuUeoAp/mwtoC2BAzjtCPK80RaghnI1zOvTeBnebQn+lPtzKCfMMOoRpSKQMEC1AqjPU3YEVStoKAOM033+3AQQ2iohNgNDESCQwPjdeK0tDdxFEbDEzTj59zAaB1zlNZ/VMICqAAEA9JNL57ynPEObgIuhHHBeyi56b3jojnmTL/wDQxATl4i0rFxk5RchM78Yydn5SMjIQ1x6HuIy8pGQVYiEnBKkFVchv7YRdV0rBAZc8Ps/4Mrrrscd9z+ADzZsRO/ouIAAPfQTCnyxdR+uvfcpvL9pn76NSQCrLrgYfuHxyM6rQGpGEeKt2QiNSICPXwi8qQwwB4j3n0M9h2W9OMRzmPc0AgPV0K+Gew8vHxnqPeSkX53ui3XA27AJeJgkpZ/VgycoA2gfYLo+FQL8bA9vdUrvR1l8KIL8QxDoHwoGBIaGxSA4JEqAQGRkIoKCogQGhARGCgyIiUpASnIGsrPzFAxobcfqs87Gry76NW76+y148P6H8YffX4bE+CQsX+ZuyyxgmwCzCuJjE9FY34zVq9ZIZsCaNeciLT0brm6EFX7yvEAN5iMYdgAPN8IAgh4vwypAGEAbhAoJJBAgDODv7uPjC5OJKgRfueb39WHtoo9ZmgHEJuAXIJ7/sNAwREVGIjYmGjHRUUiIjUZ+Tjq6WmtxyUVn4qbrfosH/nE1nrj/L/jXA9fikXuuxEP/uBz/vP0PuOum3+L2G36Fe279DZ548Ap8+t7d2L/zBUyPfgRMfwHM6ipBnuprAOAIBPQ9RzDAexoC8Oscrx1gwJwgQcKAb4Dpr4Gpr4CpL4GpjZid3IBZBgiOf4KpsY8wNfYhJsffx8ToekwwM2DsbUwYVoGxoVdFFUBlwNjgOowMvIjh/hcx2PeCrIFjz6H/2HPoO/Iseg+vlXXs4FocPbAWR/ZxPYdDe7gIBZ7H/l0vYO+OF7B7+4vYtX0ddmx7Gdu3cqkMgZ9+fA3bfmSOwJvYuuktbP2B621s3fQOtv7wDrZuehc//bhesgCYB2Bbm9dj2+b12L75PezY8j62b3kfO7Z+gJ1bP8TOrR9B2QKYE2C/3rPtE+zZ9in2cW3/DPt3MCiQ9oAN2LeTFoEN0hTAtoCDuzfi0B4CAQUFlCJA5wMYMMCoBpTwv0NsAvgRUv9nC/ijvF/X+m1HLz36stSg33dkG7gIA2QZgz2HfrUIANTqp3xfPP/0/qvlCAMICI4eUwoArQyg75/DvexGMwBtAZT9Ew7otgAqAY7p0395bxf4/RQMoEpgN/o5+PeqRQWBoxpAX2t7gAYAA4PKIkAQMDR0EENDhhrAQRUwNMT2AKoCjpzYGGAEB4oqwPHaUAcoRYBxQj9n4FcwQA3ttAFwgHdcJ0/x19YBGxQwgIICCPwMfu3crxeYcNzQb//e+vk+TIz3n3SNi31gAHNAgGNmgC0vwK4M0AqBiclhyJoaxgQVBFMjtp0n//PBAKoEpqdHMX3csO8IBo6/1iDAfvJ/MgigGgROgAHzDNcnG3h5/2QAwHZfy+cdBuU5n8fgwHmggB6g9S7DNcGAw9LvcXeEGLZBXO7rYfrEXcMADv96qNb3uCsAoJQAVAMQBnAXWEB1gLHUcM7Xx/0uxs+qf05tDZidnQKXbhOw5wjMYxMQGEAQoOGGHVpoGKDVDNzHJ+0WAckNEBCgB3+VDcB8APvi4E9VgFpD41QJTIhtgO0CYhngaT/tAo6KgTGlDqBFQCCAzhTQzQEOEECAgM4NGJvBkA4PHKFVYBr9I0oV4AgDONDbQYCyCdACcFgUARoGKFWAggGzCgYMESzMgJ9FAKDX0LjAAAucXCwqQNDVF0tZM+hqhrOrjyxeS8sAmwbcfUGlgJObD1zdzXBzt8DVnRDAD670RXr5yfLw8oOHyR8elI9yWQLhag6ACyGA0SIg1YKSFRAG96AIeAZEwBQYBa+ASJiComAKjoFXUCy8QmKVUsCwCUiLQEgcPMPi4R2WoFZ4IkwRSfCOSIJnWKJUCjrTQhAeL4GCzpFWuEQmwVnCBRUo4ODPgd+mBmBuAMMCCQSiVJ2g1AgKAFC2AT7vWB2oawZ1SCCrBqUpII4n/Cm2tgDdHqAhgoQRxqXBm8vIC7DEp8M3IROWhEyYE7NgScyCrzVblsWaDb+kHPglZcA3KRWhGdlIKi5DARPuW9tQ2dqKkto65JWWi289izJ5DuD5+XIKz5N4DvHlVdXine+QE28Ots1oaOKgWo2q2irxrBeXl6G4ohzFpWUoLC4Bk+/zCguRV8hBvEA+lzV1mTzZz1MJ+RzwedKvLABM0S8QCJCSl480IzRQnmEGAVULeblIyck2FALKPqBCBfNFGcDPSpFncpCSlYW0nBxk5BIK8PcqRm5RmQEDSqRGsaCsFIVlJaJyoAWCwXz1DXXy+3V0KVUAT/x1bRhBAGX1PQxXW7kSzAnoWakC+FauWImenhUSJNZDKLBiBTq6OtHJ1dGJNiOpn9L8moYGqRwsraxGZU09KmrqUEIYkJOPjIwssSmUlVeg1mgkKCqvQGp2LmKTUxGRYEVYXDzC4xMQzVDAtDQkZ1BJkIui0hKUV1WgsrYS5VXloHIjNSMNMQnxiEtMhDUlFWlZWcazZWKDYFYALQJULTBDgDYBViKyXjExPR3+IaFY6u6FU51ccSorAunRX+gCgoDlPA3nQL+QgYCU+/NUnsOwPf2fIECpBJbLc6zdUz59dQqvYYA+WbfvzpInsOiURQYM0AGEVAkwdPBUOC1aIGvJwlOweMECLFm4RAZ3BvepAZ5fsxBOi+jfJyxwg9MCdQqv8wDk9QJ7QOCyxR7SHuDs5CU7B3V+rrYqLJVQQH7+MskL0L+vAhhUB6jsBP4ehAsy7DuEFerfT/IAnNzBwEGBCAQEEj6oaw2VyoDv6TpCfh5zAsQmQDWAtAmoAEG5L/c84UpQ4OIFd1dvUQj4mgMQERGNlNQMUZ9k5xUiPacAKVn5SM5mcCUtOxXIKKlGdnkdShpa0dB9GnrOOgfn/OZiXHLlVfjbrbfh2Vdfx6YdezAwPi12AFoChqaB1z/6Blfc+hDe/36vDQYMzwLdq38J35BYJKcVID4xE+GRCQgKjYZvACsPA+Ft8Yenj5/I9R1PsBkKaDv1NyCBKAc44Htb4OrlAzdec1D2YZggMwVMkqCvavVUu4AK1zMaCJg74M5aPhUsKMoDNxPM3r4IsAQiJDAUoVQI+IUgNDBCQgKZbRARGYeExHREhMcjKCASocHR0hIQExWPlOQ05OYVorCwRMJCz1pzNi644Fe45ebbsO6lV3DbrXdIwOCiBc5yUq9/R1oSUpLSBAa0t3Wiu2sFmprakZCYKiGK3t6sIlQhgwxBJNQgGNE/+9xmAW+xDHhJjSBBiLIU6FpFX5MZvgIFLDB7m2Dx9lbVgX7+8PdjTWAQQoJDQSBAdUB8XCwy05PR2lSB3/36DNx75x/x+ks3Y8P7D+C7zx7Dpg2P4ofPH8G3nz6ILz+8H5+vvwefvHsXPll/J77d8AD273gOI71vYnb8Q2D2K0Parwd+ZgVw/ScwwBEEHGcT0MoAgQLMDvhawYBpwgAFAmYmP5c2gSkJEPwYtAlMjr+HqfH1mBwjDHjHsAq8ibFhZRUYH3wF4wwTHCIQeAFDfc9hqO95DPY9h8GB59DXuxZ9x55B39Gn0XvkKRw7/CSOHXwavQQD+5/B0f0KDuzf9Qz27XoWu7evxc5tz2H7luex9Ydnsfnbtfjhq6fx7RdP49sNa/Hdxufw/Rcv4PsvXsSPX72MH79+BT9+/Rp+/OYNbP7uTQUIfngbP216Bz9tehvbN7+DHVvexa6f1mPXT+/J2rntPeza9gH2bP8Eu7cRAnxgrA/l9W4NA7Z/gn3bP8H+HZ9i/87PsX8XYQDX5ziw+3Mc3L0Bh2RtxKHdG3FwjxEauPcbHNz3DQ4f+A6H93+HQwe4vsfhQw5qAKn522ok+lPCbw/t6zuyE1wyhB/djn6uY8Yup/SU8avTejWw71RD+VF7kJ98ngzseqAnGNiG3t7tOMbF8L9eJv/rEEC75J8ggKf+J+xy6s+T/13QFoGB3l0YMJ4f6NuD/t49GOjbK0ueM1QBdgDgYAsY3I/+wf2wQwANA+xAYHjoMIaHjxy37FkBkhGJV6CIAAAgAElEQVRAAMAKQdlVToDkBcjJ/1zZ/vioGvbVyb3OAuAg7ggB9DMq9d82xBtSffWa76lMgTlfO378Z9mBgO1zDCDAgV4N9w5fM04Y8HOLoOAkMICZAXxPgMBxMMCoDpyYJACg5H90zpKhn4O/42IzANsEZrhG5lm8P7c5wFEJwLpATNMCcDIYMH/9nX3o1MOnMeSeZJi3eebnsQkQCMwZ/E/yGfPBAP1z6EGaw76+/s/2aVBurxdP2e2n7RoQ6FN3/Vrtk/Tni0ffrgRQPxefn/usBgL/k59TIMC/gQFiEZDvYQcBKuTQEQYoMKFhwPgkbQ12GCA5ATZFwBiGRkcxODqKAe5jYxgYHZOhf0DyAggDJqBhgFIGEAbYMwM0DJAwQd044BAwSCigGwQcFQH/ExjQbwzwvYY6QJ3uq5N+yQxgbsAwrQCqcpBQ4MiQkRMwqCwFGh4cc4ABQ2OAXv9nMXMCDAhAKOAIA5aLOkDBgOXufqIckOpAdzNcNAhg6rWXH9w9WSfFVOkAWR7e/nDzDoC7TyDczYHw8A2Cq18IlhvBgVQHMEBwuX+owADvwEiYAiPhFRAOU1AkTMFR8AqKhndILDwJBBggSPsAVQEhcbJ7hyfAKywBXuEJMEVYYQq3wissER5hOj+A6gArXCKSZDmLYsBqhAOqPAAqAlSeQJJqG2CoYKSCAVQEEAAolYCqGCQAUAGCqVAZAlQHWOEdq5Ya/A0YYAQJEgxQLaDVAVQImOPTDWVAmi0wkEBAVkKGQAE/DQMIBwgErOkISEpFVFYeMivYItCIqrY2VDa3SNVdDoP1pJ6PJ/Gqyk8k+Xm5yCsuRnVdHVrb29DV3YWu7k50dLWipb0Bja31aGiuR21DLarqalBZWyPp+2WEApSyl5QoMFBIO0GhKAUIBAgD0nJz1aK/ndV4VAbQM88QPUM5YAMFohTIQ0puLlJ4Ks5QQSoG+LMagYW0BrCCz5qVKUNsQloaEtPTJA2f95nan1NcirySUhSUlaGoogLFleUoqSwX20NVTbV48ltam9HR0SaSf4brrTiNi0BAXfecthI9pxMIrBTlQFdPN3pWrpThv6ebygACAaoDekQdQBjQ0UmA0iZBgnWNjVI5WF5Tg/LqGlTVUmVBGFAu4WGZzAooLEJldY20EJRX10qWQFSCFYHhkfANCoUlKET2gNBwBIWFIywqWtoC0rMyUVBSiPJqAoFqlFSUS35AQlKSggGpqUjPypZ/DsVl5ahvbEZbO3++bjQ1t6K+QVUillVXI6e4SKoVLQGBcHLxwKIlbljIcEBK8E9ZDudFzlhOnzubBSiFX8yTfwMGUAUgSgAVIMhTevHnMx9ATuzV6b9WDnBA5ufKLqfrSmZPVQAH+SULF2LJQjXQ24d8BQKcFi8AF2HAYqoERO6vav34NYQGSxYuUlkDi9ywxIABAgYW8jWzD5hzYF+sExQLgNT/UW3AEED+jswzUFCC6oRFpxB6KPjBhgU16BM2uMtpPod3bRHg76oVATZw4JAjoKEAP4NWAMe/jQ4mJBQQCwEtATozQPIDCAn0PVU3SGAglYNu9Jn7SmJ+XHwS0jKykZGdh/Rs5kqwraIQ+aWVKKqqQ1FVPUpqGlHd3I6W7tPQfeYarDrvApx38SW45E9X45Z778cLb7yDDd9vxebdh/DjroP4avMePPr8W/jjjfdj3QffY3AWAgq+37Efjd2rEBiRiHhrFqJikxEcFoPAkEhY/ENg8qUywB/e5rkwgGGCWt4vNYImFR5IOMDWAZ6as4ZQtQmY4WFiqwArCH3EPuDm5Q13wgJPH6kd5Gd5eDJ/wCIwwN1d5QxwoOZw7ePlC38zk/NDERwQhiD/MAQFhCM4MAIhwVFSMciKxNhYK4ICwxFKQBAWjdiYeCQlpQi4Y81nfVMjVq85C+ef/0uBAe+8vR5PPPYkaqrrQRjAn58WAV/fQAEz6amZqKyoQW1NPSrLq5GXV4xwVhGaA6WOkNWD/Ocmdg/+rA4wgyGEAgQMlYCnuye8PLzg5aVCBHWeAIEAYYDF2wc+cu0DX5MJfhYL/Hx94e/nh8CAIAQHhSAsJAzRkVFISUpCXXUpLvn1Wbjn9iux/vX7sOXbtTi8+w307X8LAwfexsCBt9C7/w0c3fsGDu9+HYf2voZDe19B/+E3MTrwHmYkJ0BXCR4PArQNQAMBR0WAvuZ7GgLo5/Rrh8yAE2CAoQywwYAvMDPxOWYmPsPUxKcQIDBBZcB7mBx9F1Nj72Jy7G1M0irAEMGR1zAx8qrYBMaH1mF06CWMDr6IYQKBfq7nMNj/DAb6nsFAr4IBfUeeRu/hp3Hs0DM4dvAZHDmwVrIEDu99Fnu3PYU9257Gzi1PYfM3T+C7L57Alx8/gs/fexCfvvMAPnrzPnz0xgP45K2H8Onbj+Cztx/Fhncfw4b3HsfGD57GVx8+i68/eQ7ffv4ivvtiHX748hVs+upVbPn2dWzb9DZ2blkva/e297Fr2/vYvf0jgQG7fnofOwUUKFiwx7i/dwcVAcYyQMCB3V8YQIAwYIOCAXu+sCsD9n6Jg3u/wkHJCfgWRw7QHsCwQFUJePQw8wE2gzWAkuSvJfq2BH8CgF3oMxav5eT92A70H1VrgCfxxom9BgHc5bmj3I2h3gYCDBggQ78a/I8d24GjAgMUVBCw0KtBwi709+1WMIDy/z5+njr97+uzgwDCAAUE+KxaGgYoIEB1wG5oCDCfHWBg8AAGhpQtgGoA2gO4jxAADKmMgBNgwNARjAwfNZYBAAwIYIMBo32YDwbMGdpl+OcQ7jCIHwcE1LCvgIEe5G37qA4XdFQB9GGcMMC2jgsA1KoAIxyQCgA+y+Fff83JQYBWC5wEBIwPSFYAQYAdBhhAwAgEnDSAgM4EOH63gQCj/o8n++qUn8oADQUc9zFMz4xjemYCM7LGMTNjX7Mz48DMOLifqBJQqgBdf0d1AAfseU/X5fTbPgzPN9zbVAAOQGC+5+a9N48qgD+HLQRwdhJTXP+vwAAFAhQYOH6YP9lrAgE7GCEMsL/WEIE/n8Pf7yQ/q1YGEAYoZcD8NoG54YE/BwPsYEABAYYIskmAQMARCoyDtYIEAI4wQF6LIsBQAwgMmFRQYJ4AQd0oQECg7QKiGNA5ARoGzFEFqIwA2gNYKWjLDBibaxPoH52FgABtFRjmCT9tAzMqQFCGfwUEmBmgageNYEF5TwUNMi+An8MmAaoCNAhQygA3Qw3g7oclLqwUtGCZi1IG0AagsgEYLKhsBHxNS4AzYYAHk6D5f/rUIgyQWilvf7h7B8DVOxAupkC4OcAAJ0sQlvmGiEKAlYJOfiGSFUBFANUBXoHhMDGl2gEGeFEJEBID9+AYeBgwgBYBT1oEDBjgE2GFT3givMOt8AxPMiAAQYBazuFWLAtj9aCqDqQVgKoAyReQOsEkmKLUYsOAKUaFBerTf576e8Wo/ADCAW0d4Gk/lQFq2E9SygAGCjJI0IAB3JVVIEmepbWAvn/mBujmAO76WqwCCbQIKIUAVQIWaxb8EtMQkpyBxLwi5FXXoaKlBdWtbSirb0AOU/3zeHKvgvcIA2TILsgX3z+95bUNDXLKzXC87p5OdHS3oq27Ga2dzWhub0JjayPqmxtQ21iP+oZ61NXVSuJ9RWUlyisqUUI5fnEJCoqLkUsLgQzuhAC0IqhsgrQ82hPyJCcglcoEUSfYXzM4UGBATq48wxBBNgvQ1y6NA3n5SM3JRWJGBqKTrIhISJA9Po0BiNlIz8tHTkkpCum1r6oCh3HCi6raGoEAjc2NaG5rQXtHO7o6O7FixUpRAajT/x6sOI1Dfw+6V/ZIlSD3zp4uWV0r1PDPmj4qBLq7e9DVzRN3whPmB3Sgpa0VzW0MEWxGdX2DnL5X1PD716GqphYlJaXIZXhhbp78vQgNmOpfUFqO+JRU+IeEweQXqE5STVTVmOFJKbCvH3wDAxESHo7YhAQoIFCMihq2DFTL35uVgnwvKTXNBgMKy8pQW9+E5pZ2tLZ1or6hGTV1jaiuq5csAkKbyNhYeFt8sWCxM06VwdcNS09xwTKBAcuVb59D8KlsC1hqhwGnEgyoRUjA9+i5p0Jg4S94Qs8B2v6MnIxrCb0O/GOivtMyLF+6BEuXLMTSxap2UAXyOcFpMRUDp2Lp4oVYuoTD/gJQRaAS/GkRWIaFp1AtQGiwWGAA5f9LTtVWAR0GqIL/lFKAMn91Is+fT5oKFhMGKKsCYQDBAGsSlznx91K1gvx9tNJABxcuM1oX9O/Gz6MaQLICHH5HDQYICtSzKoSQigsu/jy6ZlBnCXC3wwAqA1zhvNRNhn8qArRKQMMADr2szQsNi0R8QhKSUzMklyI9M1uUAkVlFajgUFrbiMraJtQ1t6Oj53SctupsrFi1BivXnIszz78QF116Bf584224/b7H8Mjal/Ho2ldw3+PP46+33o+Lr74d9/zrdXz49Q58+u12/PPxZ1FQ2YzQmBTEJaYjMsaKoNAoBARH2GGAjz+8ffzsCf8mDvtqcYj3ksA/tVMZwP+9IAzgtVgKjIpBT+4CCMwgDKBygIDA3ZOJ/Mwd8JVh2tuLgYQmuLtRMaFUAgoGBCHQL1QgQIB/GAL9IxAUEIGgoAjExCYhPSMHcfGEAaEIDQ5HZGQMYuMSkJScjLz8PBQUFUrGCGHAOeeeixtvuAkff/Qp3n3nPZy28kw4L/MAJf+EAUFBYYiPS0RmRg6KC0tRXlqJnOx8xMUlITAoXGCAydsPZuYeEAC4eatmBbYiMEfB3QRvY/d05+/hBQ0D9E4wQCBg9vaBxdsMHyNc0OJtgp+PD3zNPvC1mAUKEAYwzDAkKATxsbEoKcjH+WtOw+03XYk3X74Pm795Eb3712Ni4BPMjn4OjG7AzMjnmB37AjOjGzE1vAETI59javxzTI19Kh59cBiHtgdwwKcagFWCji0C80GCk8EA3j8JDLABASoDvjEsAswLoDLgC/l5CAQUCPgYUxoGjK3H5Og7mBx9C5O2AMFXMDHCzIB1GB1UIGBk8AVRBxAIDPc/i6H+pzHY+zT6jz4lygCBAUeeERhw5MAzOLTvGRzcsxb7dzyN7T88ih+/fBDffPpPfPbOP/DBq3fireduwatP/h3rHr8BLz16PV54+Dqse/QGvPr43/Hq4zfh9SdvxpvP3Ib1z9+D91+6H++9dB8+fPUhfPbOv/DlB8/g64+exfefv4gfN76CLd++ge0/vI2dm9djx+b12Ln1A1ABQBiwe9t67NnORbXAR6BNYN8OZgWopWwBX+DAblYGqtBAggFRBmgYsPcrHOaiImDftzi6/zscPfADjh7cJKv38GYck2UHAdqLbx/qOXjbh+u+Y7sx0LtbTt55+s41yNfyjDH06wA/vs/3jEFen9YrXz9zAKgk2CEhf5TvUxHQ17sD/XMWh371uQMCAdT7/LqBPkr+d6GPn28sda2VAPtEDdBvqAIG+veIZUBDAL1ra4BkAwwpGGCzBQwdwvDgIYwOHcbIMC0BhwQK8NpxjQ4fwejwUYwOH5O2AMkK0EDAZg3QeQC0BzALQLUC/Nzw7wgL9Km/BgI6xM9mC5ijClCn/3yWn6GG+5OBAKUGkGcc4cNJ1QAaAvwbRYDNHjBoBAgauzQJjEhl4M/BAA0CThza1ak+ocDxKgC+Jgyw+9DV4M/hX6/5YIB6jwBBefIJBGww4LihV5/Oi/z9ZKf6J7EKzDv4n+Qz9Pex7TYYYICAWdUQ8J8pAozfz0EVQEWAWlopcDIAMN99+1Bu+zkd/14OAOB4cGFTAtiqBf93MIDfl9YAqhIc7QzKLsDcgClDGaBBgNoJAjQMGBofg152GKBUAScqA2gNcFAGaCvAPDDADgrsGQFSJSgAYAaDYyongMGBsgyrQP/YDPrHZsH6PzX8q9wAx2ue9GtFgFIHEBCotoHDg1NgsKCtRYDBgSNAvyMMGAeGJ2gTEBhgH/SdWB3obMJyBgRKu4AFyxkM6LCWiU3AAjcDBrh5+oKLNgF3L394eAfC2StAgQCfoDkwYKlvCJb6hWKpPxsEwmV3YWaAgIBIeAZGwiOIi8qAGJhC4tQKi4NXaCy8mRMQqpQBVAl4hyfCI1SBAa8wK7zDkwwYkAQCAIEA4YlYEhYv14QBtAhoe4CroQzga0IAqRqUYT9FcgJ4ms+AP57+85rDvwCAmGR4RRuVg1ITyNP+ZMMmkKyyAFg1aIAC34RUeV/AQJz+DCoGGCKYBnNcmpEXwMaALJhpGXCwCzAzIMCagci0HKQWlaO4vgk1be2oam5FUWW1eNApp2fgH0/v2QagfPbK50/pf0NzEzq6O9HVw+G2Ax09bWjraUX7ijY0dzShtbMVrZ1toh5oaWlGc3MTmpoaBQzU1tWiurYGZRUVKC2nYoAJ+iXy/dgSQCCQlJUJa2ameNSTc3KU1J/KAbELqGwBhgmm5uYhJYdQIA8p+flIoXVAQg/VPWtmNuLT0hGRkIiQmFiExsYhKtEKK0Pz8vKQW1qCYoKA2lowkK+2sQENTY1obmlGe0cb2jupfuhAT3eXeP8VEKAVgCCgC90rOkUZwUyAE1ePQAAFAggHVqCrq1tqCbvY225UDjY2N0sOAK0BPPWvJJyprEExmwXy8lFQUIiKqmqp+Kuqq5d/FhGxcfCw+MLNZDaGHHaL03JDabQPvOkF9vVDSFg44hOTJHywrLJKmggIYBKSkhEdF4+ktDSpTKSFQ4UP1qK+sQWNzW0CBqhSKK+pk2BDthmERkTJkLVksQsW/ILDuxuWLXCDM+0BpzphCSEAh2ZbVSDD8tRJOU+4GaLH9H9K6jkMK3WAAwRwsBPw1JtLDdUc2N2Nur8lcFq8EIsXUO5PqKAk+4tPXYRFp/IeYcFiLF3M7AAO/SpwUMn6Obzz+7OBgHkFBgwQSb672ABUC4Ia5mVgX6L8/BzO+Tuo2kO2DRjfVwcays+iTvv1s/I7Gy0GVDpQLcClAQOfO37x96WKQuUV2DMIli10gQuBgmET0CCAg75uFmB+AF9TVcC/nQoWVPYBwgLCAHfDLkAPvq9fEIJDIxAVHYfo2HgkJ6chKysX+YXMnGBtZR0qq+rk34XOrpU4c/XZOHPNOTh99dmyzj7/V7jk0itx1bV/xw233I2b7/gn/n7bPbjmutvw+6tvweV/vQt/u/k+XHbNzThtza+RnF2G6IQMSeYPi4gVVYB/UBjM/kHwtgRIpaAO1dMSeh20Z1MHGNkAfJ//OyGDPaGBiUBAtQOYzLSZcfjnfx68pTVAXXup3ACq0Nx5am4EEhpWAW8PM7w9LPD1CYSfbzACAlgxGIbQ4CiEBEYgOCgC0bFWWFMyEB2bKO+HhEQiKioW0THxSExKltBR5nsQmK4++yycbcCALzd+jU3fb8YfL7tC7Bpm1hj6BSEiPBopyeliCSorrUBeboFYBiIiYhAYFAqTjwoY5OCv8wE48KtrVkd6wtPNC55uJjBDwN3VHR5uHgIEeG0DAu6eMBEKeHjbWgioEPDzUUoBXx9f+PsGIMAvGIH+IWCbQHZGOk7rbscNf7kML629B99/+RIO7lqPycEvgDF68b8DJr9Xa+oHYNJY05uA6R8kwA+zP0CWBAbS388h/idgVnv/9cCvLQN61/e5OyoDNATQX89dr82ALTfgOwUDJDNA5QXAAQZMizJABQgqq8D7EiDIJoHx0dcwMfYaxkdfwdjwyxgf1hYBZga8oMDA0IsYGXgOI4NrMdj3tE0Z0H/0GVEGHKUy4NBz2LvzX9i59TFs+up+bPzgLnzw6k14/elr8eLDV+GZe6/Av+74Ix656VI8eP0lePC6S/DwDZfg4Rt/h0f+/ns8dtMf8K9bL8czd/4JL9x7LV5+8Aa8/NDf8dpjt+LNJ+/E+uf+ifdffACfvE4FwZP46qO1+P7zdfjpmzex/ft3sGPTe9i5+UOBA7u3votdW97BbgEDHwkk2GtkBRzYSTWAggDMByAMOLibagC1juzdiCN7v5J1dN/XOLb/O/Qe+N5YP+DYwU04dmgTeo9sRu+RLTh2eIuyBuhQPpH2Ow72dhhAMDDYtweDvXvnLhm4OYSr4X++XQ/1Su7PYd74HhzoqQLoVYBATv37CAHUwK9VAPo1IQBXP2EAv84BBvT37waHfrX2qZpA/mxsCOg3XktbgLYGqHsEAgIDJCyQ1gDdGMDhn8oAYx9WUEAP/2MjBAAEAQoGjA0rS4AKDjSsAiO6EUBlBMhwbqgAOMjbPfon2gKOhwE6bPCEWsE5IEBbCo63DOjvZYcCdnk/79nBwc+rAU6uBNCWAKUEOA4C6HYBh1pBaROgRWBqdM7SCoGTgQCtEPjfwAANBWam7eoAGwygGsBYAgMcB9vjrv9jGPDvcgIcocB8ygB+f8KKWWMZp+7/9zBAQwD7PmUL6LMDALtE337PbgtQp/H218YzGq7Ms2slwJxsgHkDBCfBEEGtDFA/hyOE0EoAwgAFBKgImAMDDFWAY4Dg8LjKDFDD/5goBCQzgDYBaRAYN+T9cwd/gQOGWkBZA1TdoFYFjBAKjNuVBOoZBxjgGBhowADmBTA8UK0ZDIwSBMwoGEAgMKKggGMrAK/nwABDLXBU1w8aO20CfYQBw7MYGAUGR2dlDY3PYpiZAYtczVjs7IPl7rQIMEiQTQGqNnCZ5AWY5b3l7mYBArQJiDrAjaoA/p83f3h4+cON194EAQFw9QqAmykI7j5BcDcHCwxwY26AXwgEBviHYXlAuFElGC7KAM+ASAkQdBcYEAX3oGh4BMXAKzhWrAKmUAMGhMbBIyQWXmHxYg9gdgCXAgKJ8DKUAS7hdlXAsvBEOIUnwFWCAhUI0PJ/QgAdGGhiPgCBgAz6KhyQwzyXygVQMEDJ/FOlFcAnNlUGelOcPThQnqU1wAEGiFXAliPA99TXaRig7AEqPJAQwCeRYYFGZkBiFvysmQhOykJsVgEyy6pQ3tSKuo5OVDY2gdV77J1PzkgHT4IlRM8Y1rMK8qU+kJV1Ta1N6OjpRGdPBzq729He3YZ2AoFuQoAWtHe1ob2rA22Uw7e3oo2rrQXNLU1oaGpAfSNr8WpRVVODsspKlFZWIreEqf5FMqQnZqSDJ/gEAmwwoO8/OYf5AKwSJAxgtSCXUg/Ie4QDBgxgnkBKXh4Ss7IRl5pm+OoTEBobj/C4BMSnpCAjLx9sDSAIqGlslKC8ptZWtHW0y+rs6kBXT6dUA7IRoLu7W4CA8v93o2dFl7zf2c3neK1O/QkFaBWQIL7uHogHnz78TrW6u7rR09WDzs4uaRRoYmZAbT3YJlBWWY3yqhpUVFajuKQMBfkFyiIgMKARlTU10uQQHh0Nk58fPAkDmKbOocfdG87OHnBz48BDr7BZJMjh4VFy8ltUUiZQoai0DNaUFETHxyM5LQ0ZOTmiFigqK0dFNXMfGmVV19ZLYCGtCwyMTEpJR1BwGFxdvbCYp/oCA1yxbKHOClBqAAn6W8hBW9UE6pNu2/BvqAIow1dZApTW0ybAwVf59+VZUQaoe1qiT8jAQZ4ggJJ/LdPXA79qGeCgTyDgBGYF6PYBDQMWL6CCgF+rYQCVAFy0AniIbWDhL3j6b/+ZZGBnQ8ISZgksx3InXRNItQB/HkKHRQIKbBDDaBMQRQCbFgy1gPosQgUFQ6gO4N+MgIDX+u+l7/F5XjsvdoPrEjcsPw4gcPDXCgOVGaBsAY5tA7zW0IDP2IAAa+3M/hIoGBQShsioWCQlpSIjMxt5+QUoKS5DcVEZqqpq0d7ehdWr1+D8Cy7EOeeej7PPPQ8XXfRbXP7Hq3DddTfjttvuwZ133ofb77gX1914Oy7903U47zdXoPuMC1BR343swjokpOYjOj4dMTFWhIXHIDA4HL4BwfDxDYSXxR9ePr6iCmDyvdkcAC8vpQqgHcDTi8uoCRTFAK/t9xU0UA0E/HrVRsBh3yT+evHZG8O/u4dZmgkUDFA2AQ7bPGEnDLD4BMJiDoK/X6gAgPDQGAUEQqIQFWsVIBDKnz8oHIQBHNxjYhJgTU5FXkGhhHFSybNqzVlYffYa3HDD37F50xYcPngUN//9FvhaAuBnCZQGgbjYBGSkZSIvJx/FRaXIyshGYkISwsMiERAQIuGCBAcmhih6mGCSrAAqALzh4eoNdxcO/lQDmEQ14GnAAQEDLh7wcPWAFwMG3b1h8vCGl5unKANoE7CYLKIU8PMhAPGFnyUAAb5BCAkMgzUhES2N9fjTZb/FYw/eig0fP499O97HSO+XmB37Hpj4EZjaAkz/ZKytwDRfbwFmtgCzDoM50/0FCvC0/jtglvv3xr0fjGpAPdxrG4BWCswHA/QzGgzo3bAMCBA4GQzQNoFPMDXxkayJ8Q8wMfaeAwx4HWOjr2KMMGDkFdUqYAAB5gbQLjA08DyGBp4VGDBEq8Cxp0QdMHBsLfqPPItjh57Fob3PYMfmR/HlJ3di/avX4eUn/4Sn//l7PH77xbj/bxfg7qvOwV2Xn4M7/nA2bvvdWbj9d6tl3fGHNbjzsrNxzxXn4f6rL8TD1/4aj133W/zrxkvx5M2XY+0dV+PZu/6MF/95PdY9cCNeffRmvPXMXXh/3X349M3H8NX7a/Htxy9g04ZXseWrN7Hlq9ew/bs3sJNWgs3rsXvrh9jz08cSHHiA2QC75sIAAgHCgMN7vsBhAQEGDNj3NY7u/wbHDnyL3gMGEDj4A3oP/oBjh35A7+EfBQaoRgBW/NHDz4FcefP1roZ4Dvn039thwFDvXnAJGNCn730/DwTskGCXwAD1mtfGgG+oAmTYd7jW7x+/0zLgCAOoFCAIGOzfCyoC+vr22mwBHPhtaoB+BgSyMlAt2gHmwAAGBUpY4EEMDx3EiIQI8voQRocPi1JgdOgIFAw4irHhoxgb6ZXFtoARQgJCAO6O9YBGPoAavB2HcxsRVuIAACAASURBVF7/PAzg+0oVwJpBPk+lgQEYRNY/z9cbcn813NMCYIAAZgOM6ZN9x5P+4691VoC+/zMgwFEJYNQFsh6QtYE2OMCqQYfF1oBJCQ4cVlkAzANwWCeDAToQ8Hh1gFIFKIvArINNgMO+tgs4XoulgPkB8r5SBsxw2ObXGlBg3hNvwyag39P+ftvuONj/L6+nTgIExLqgLQzG/p8DAaoB7MP/fNcEAvr+CUP+CdkAcwGB/jqlONBqhLn7CTDAsAkQdmjrAEGBvp6WXAP+zPxeJ4MB0woCMPyQTQdGeODYcRYB2gVk8LfVBtphgB0OqPYAfbqvIQB3R7WAhAUepwrQNgH1tQ4gwAgMpDVAVAGEAMZiaKBaM+gfYdjfNPpGZtCrrQKsGByZwVEuAQEKBjA7wHFx+CcQ0HvvCTBA2wRmMTQ2i/+zWACAD5YZVYEaBBAM2EIECQKMJQGC7hY4e/jBzdMfHp4B8PAgEAiQ0EDaA9y9A2V5+ATDzVAGuFsC4e4fimV+IVgWEArnAAKBUCxnpWBQBNxYKRgYKbunKALi4R4UA4/gGLEIeIZEwys0RtQBVAjIkjYBBQOoEqBlQEIEw6kKYF4A7QLMC1BggHWB0hrAoEDjZF8rBET6b8AAn5gUeFMdYEAAWgQ4tBMCsDqQr6UOkCDAUAqY2BgQr+wAzA/QigC9mxNS4cWvFQtBMnxYMagVAfHpShkQr1QBtASYrdkwJ2XDl8GB1iz4WzMRmpKDxNwS5FTUoLKlHXXtnSirq0dadi6i4mKRmKxOkzk4UlpeUlmBgtIiFJcXo6ahBs3tzaIGoCKgs6cNHT0EAu1oEwjQpgBBV7tU8bV0tKCtsxUdVAt0tKC5rUlWQ0ujtBAwf4B1ecWVlRLiR0VCYnoGYlNS5VQ/KStHKQCyc5GcnYNkqgDy8o2dcICv8+S1gAIjdJDXhAQJ6ZmITmLQXjIiE5MQbU1GQkqaBAnml5aC0nwG+DW0tEg3eEenEfLXRRDAob8H3Sso8VfBegzX69b3ejrl9+7obgehgIQDMkOhswPtXWwPoCWgCx0dDA3sQldnjwEF1L3W1jY0N7cIDCgpr0JxWQVKyitRWl6BktIyFBWXyF5dWwtWODJEMD0zE5FR0QgIDIKvhfJh+oeZFu8BNxd1KugmAwJ7yC1gPVpCvBV5eYUoKamQAMfE5BRRBjBAMCM7G7lFxWAoIf9Z859HdX09qmt5KlyN0rJy5OTmi5zc3z9IhkoOshxa5wyuRko/h1pJ/V9ImwAHbnswoAIFzAJwxdKF9MFzKNY+ewbtEQYoy4BI8iXgTz3HrxXAsGCJDPgiz5dU/6Xq9P9UpQJYZOxKwq/k/PbcACexEGiLAb8XlQBOC/g91K6BBH8PlR+g8gKWnKosAErhsAzLFiulA7MCmEFA+8GiU6gWME77RfqvmgY4rKvPcxaJP6/5N+SuYAA/27g2bAkaBsiwz5P+Ra5wWeQKZ+YOGCoF/m0VCDCaB5YrlYDdMqDCAwkDqBqQ+0brANsHOEB6UGLOSjqzBX5BwQiPikFcQiJSUtKQmpKOtJQMOa2uranDaStPw3nnnovzzzsXvzz/PFzym9/i6iuvwU033Iy777wX99/zEO75x/24/vpbcPGlV6Lr9HNQUtmCpIwSJKQVwZqWj9iEVMQSBoRGCYTw9QuED1UBFpUXwBN/5gQQBpi8/OFNMGzYxzj8S1OAUR2o7AEaCChYwKFfqQbMqn2AlYq2WkIVvudGSwAl9wLSqBBgm4AZ3m4meLuZYfYOgsUUhAC/UIQERSAslE0C0QgJi0FkTCIIAgKYKRAUgfDwGERGxiMqOh5JhAH5BRKaSnvNGWetxqqzVuO6667HT1t+wsjgCB5+8BEEBYbA3zcQ0ZExsCZakZOVg8L8QlkZ6RlIiE9AWEg4AvyDBRxYTH7wpVXA0wwTFQLuXkoFQJWHC+GOB9xdveDlZoKXizc8XTUo8IKnqxe83Tzh7eYNk5sJJoIBT2+YmBvAKkVmB5h94W/xh5+PPwJ9gxAfHY+K4jL89sJf4sF7b8P6N5/C9s3rMXDkS0yN/ABMbAWmdgLTu4HpncDMdgUECAemNgPTPwJUB0x9j9nJbzAz+RWmxzdieuwzTI18iOnRjyVHYHbic0n3l6T/mW8VIBAFAYd6Q0EgdYN6+Nf7fICAMOF4GGAECBpNAqIMmPwcM5OfYmqCFoGPMTnxEebCgDcxNvoGxkZew+jIKxgdfhmjQ69gZOhljAyvw8jQOgwPvigwYLCfMOBZDA9QHfAUBo4+iYEjz6Dv0Foc3P0Utn73ADa8fytefeZKPHnfb3D/zefjtqtW4ZbLzsSNF6/A9Rd24fpfduKG8ztxw7kduPH8Ltx0YQ9uuWglbr/4DNx5ySr84/erce+lZ+Hey9bg/ivOwwN/ugCP/PnXePja3+Cx636HJwgIbv0jnr3nGrz00PV47Ylb8c7au/HBS/fjszcex8b1T+PL957Cdx8/h81fvIyfvnkD279/Fzs3vYfdmz/EgR2f4cAuBgfSEsCAQN0esBFH9rBFQAGBw/u+wpH9CgYcPfANju7/FseoDiAMIAigMuDwZvQd+UnS/+eEBRIGaKm/7FQGaOn9Xgz27cWQrH0Y6jMWT9tt6gAO42oRIMh13x4M8Xpe5YAdBgz0q+vjVQBUEej3FBBgjoDKDyAMECDQzzwADQPmVwIQBihbACGAqgvkPmgM/hoIaGXA8PAhjHCJMuCgXAsMIBAYVjBgbOSYHQQwINCmBFCKgLExVQ+oGgT0AK8Heg7n84AADvFjxzA+flQtXhuwQNsFBA7QbmCDBCeBAYZNYGKCAz2He+56qJ/v3nHvydc5fo1+32F3CArk4K8XQcCkIySwqQMUFCAMYK3g1NTwvM0BHPaPBwIaAKjBn/kA9sWcAHXSzMF+HNOzCgI4AgB9zfdkyXMTIASQE2ieThvSde4nywzQIGC+/T+xA/zssycBAvyeAgUcZPj/XwAB+1A/PU844FwAoIGB49eowX3+kENHmwBmp8DFzABRPhgQQMMA9bspO8OJf29HZcA0Jth4MD2JMaP+kPvoJCsFdWaArhXkyf+JS8EAhgnawwN1gKCCAMapv7YHGK0CWhmg93kVATYYMCVZATY1gGEP4GulCJhF3yiBwAx6uYbZLDCNYyPTODo8LaGBBAC2cEDmAzhWDuprW8YAbQJUG6g2AVtmAGGAkytzAkwKBjAw0MXHUAgY9YFuPpIRIIoANgl4WLDEw4JFVBJ4sl3AF86e/nAzBcLZOwDOpgC4+KjlZg6Cq7HcfYPhwsBALgMGLDMUArQJeARGwj0wAu5BkfAKiYEn8wHYKCABggQC0QIFFAjg4K8aBQgA3MPiZXka4X8eEcwCsMI9MhnuUclwibTCmXaAKKssdx0KaOQGSIVgTDJMXNHJMMekyC65ALEMEEyUCkHHbABeW6gGMGoBKf/nIizQagINAnifMMA7nvkC6jmfhBS5R8UA6wh9E9OkdpB5AZbEDFisGTBbCQcy4GfNgL81A+FpuUgprEB+TT2q2jpQ296BoqpqJKami7Q8NjYOmZlZMghyEK2uq0VpZTlKK8okC6C9ix7iDqUMWEGbQAc6ujtkMKYqoLOrXST2VAcQBtA2oNQCbWjrUuqBlo5mNLY1o765CTWNDajg96iukipCwoDo5FTEpqbBmpUtQ31yTp7ac9XgTyBAq4BWB8hrrRrIZxNBoagICBAS07MQl5KO2JQ0JKRlICkjS2BAblERKJ+vra8HU/2ZoE/5fnsnFQ+daukcgJ5udHR3oZOn/T2sClS/c0cXB/92sU1IW0B3F9rkMzrR2tGJ1vZOtLV3oL29UxbBQLu87lCNAk3NqKquQXFpOYpKWAFYJn93DuFlZeWorKxCXX0DamrrUFxSipTUNERGRyMkJBQB/gGwmH3l/9hrr7CCAjwRVD5oX7M/IsOjkZaaibz8ImRn5yIh0Yq4+AQkp6YhMzsXuYXFKCgpR0lFFSoIAerqRIVAKwdDH3lSzFNjk8kPS5a4YuGC5apFgAPzIhd5rWr2mJ7vgkWnOJ2gDODgrYL5lAdfD918ngF7HMY5fKv7yrevrt3lPodnWgx4+q+Ge9UQQL8+T+YXnsKcAGUJ0AoBvicBf0aIoG4dUMoCJ+Pn4Wk/AQQHdA7l9sGd9xf9whWLT+HpvBuWLvSQU3oVQMjBXykDxJqwmJBimYIBerA3TvwVQJgLCeSe8RxBAF9ryMJMACoTWNHoTAvDQhcsX+AC18VuqrWBPyOtBHyfLQ6LXOQ5F7YLSH6Asgs4KgWoDCAAoCpAwIC+5u7mDQ+eOpv94B8YKtYB+uCjouIQFRUPqzUNRUVlaGlux8oVp+HMM87E2WvOxkW/+jUu/+OVuO6vN+DWW+7Anbffg5tuuh2XX34NVp19Aarq25CRU4r4pBwkJOfAmpKN+MQUxEQnIDQkAv4BwRAYwOBAnn4bi0M+/11jir4EBHooFQDzA2hvUL5/s3H6rwZ83mNbgH7PtmtfPYMDeXruSTUN0/jNoqZx9/BW0EC/724WCGHxoTIgBMEMCQyJQkhINMIj4hATm4ywsFj4+YYimLWCvBedKH8rqiryC4pE1cP/3jxj1SqcuWoV/nzNnwUGzEzO4PlnX0B0dCwCA0NV6KA1Bbk5ecjPK0Budh4y07OQEJeI0OAw+HFA18vsBzP/LmwScPMUGMD/jHu48ppLQQAvF0+BAbQN8J+1h0ACwgBCASoEvEQhQBhgNvnA4mOGn9lXlq+PH8KCQlGYm4dzV5+JO2+5Hm+++jQ2f/8ejh36GuNDmzEz/hMwud2AATsxM/kTZiY2Y3biB0yPfYOpsS8xPrwBIwOfYKj3Qwz2foC+I+/i2MG3cHTf6zi25xX07nsNg4fewvDRdzDW/x4mBj/A9CjzBb5Q6f/0+oOKAQ0FdH0gX2sFgVYDaAhggADJDKASgcoABxgwuRGY3AC2CRAGTLNNYFLBgMmJDzEx/j4mx941agVfxziDA6kGGFwntYJjDA8cfhGjtAcMvYDhwecxPPA8RofYLvAsBo6p3IAj+x/H3m0PYvNX9+LDN2/AS/+6HA/dfgFu//NqXH/pSlxzYQeuPa8D157ThmvXtOKva9rwN66zWnDdWS248Zx23HReF275ZTdu+9VK3H7RStz1m9Nw98VnqPXbVbj392tw76Vn497LzsU/rzgf9111IR78y2/w6A0EA1fiubuvxboHbsAbT9yGt5++C++s/Qfef/FefPraI/hy/dP47qMXsOnzV7D167ewe/MH2LftE1AhoKwBG3F475c4vO9LHNm3Ue37v8aR/d/giFYGHGRWwHc4doCqgE3oPfSjAgFHt6Lv6DYFA+jdl4A/bQ/QAIAQwA4CBvr2YVADABsU2IuhfrU0BDhx3yun9eqzHK0EJw75jqf/tAjo4V9ggAz7uzBo7Bz+FQzYhf4BwgBlE6AyYHBA1QPqTAC9Dw4cwCABwMBBDA1QAXBQLeP0314leAjDYgvg4G9AAUKAkSOylBqAigAFA6gIUGoAbQvQMKBXBnZHGEC1gD7d10O+bbeF93G4JwSwgwABAA6WAGYPHH9PPme81xYAqAMB58IADvd6aUCgX/dDnp1gCwBDANXuaAHQw77eOfDra72fAAEMEEBAYFMHiCrAEQaMYMaoFJxhfeBJYIAAAGPQ1yf++nTfURGgB34NBvh6ZnZCQQANA4yd9zn8c/B0hAF66D5xCJ0boKff/3f2gZ8b/tlCMOloJ/j/AQbMzP68QkAP9/NZBzQA0Lt+Vu06i2CuIkBDC0dlgCMM0P8M5J+DYRtQX/M/gQFTmJhWMGBcahAJBSYxJjDAEQhMYGSCLQEKBohlgLYBY+lKQa0COH4nHNCKATX0GzkCDlWDAg6M0MBBHR5IGHBcXgDVAAIFCARGWCk4IyCAu1wbIECAgMCAKVEGaMuATRWgAYBAgmlQEcCMAZ0VMAcEjAOD44AECC51NWOJiwkLl3uDgYHLnU1wPl4l4OaDJe4+WOTuIyBgsYcZv3D3wakeZiz0tGCZtz+WmwKwxMsfTiZ/uFgC4GIJhLM5EC6WYLj6hsCFyy8ELlInqBQBy/zDsTwgQiwDAgOCIuAeHCkKAPfgKEMRQDWAWh4hMfBmPkBoPBggyFYBj7AEeIQnwj08AR4MB2RjQDgbApLgEaVggGuUFS5RVjhHJcI9JkmtqCQQAogyIDoJbqwNjEkREOBj2ASkOSCWjQKJ8IxJtJ32y9BPGEDZf1wyLLHJAgaoFuBr/b5AAEMtQFuASWoECQFoE0iCOSEZlgQ+b4VvYgr8ElNhSUyD2Vi+1nRpEPC3piMwKQPRWQXIKKtGYX0Tqts7Ud3aiuziEkQlJCKQp4Nh4XJiVVhYhJq6OjBMr7q2GmVVVWhooSqgS1bnii50rugUy4C6x8FY+ezpt2/rakcLFQFUDHRzYFYKgnbaCbpa0dzRisa2FtTy8xsbZAjNLS4WZUB0Sipi09Jhzc6BNUspArQqgKf+aQWFqnowV2UH0DZA+0C6NA/wPbVSc/ORkp0La2YWEtIzkJSZjdTsHMlGYMUh1Q/VNbWoa2hEY3OLAAEm/TPgT6wOtDt0cfDvRDubALq7JSRQfp8uqgFoh2iXZ/k8lQUCFDo60NbRiZa2TrS2daCddYIGBCAM6GjvQGtLGxoaGtUJfGmZDPsMDiQIqCivRGVFFWr4sxEG1NSisKhYYABhTUREpFSAsQ7M4mOR9HB6hNXytMEAnRyfwOT49CykpWUgPj4R8QlWpGVkISsnH3mFJSgsrUBJZTXKqmvEOsEGgaKyMrEQJKWkITgkHDxRPWXBcpyycDkWMNCOA+wiF/ziFLYCKKk7T6vpq+fJ/dJFztIKIOoASdnn6b8BA2zyeA7fhAFaIk8QQLm+lunrJH++NmDAAlUZ6ET1gQ0A2PMBeG+pkSdAmwAXpf0c2hee8t8SLii5AYv4PZXMnifs/Dk5mHNf+AtVFbjwFy5Y8F+8p+oGBXRIjaE9M4CfL9WCC1RmAL9eDfuuSgngIP/n5+vvwWdk8DfaE3ifNgPmAYjdYJErXJe4S1aA80JXgQG0CrhQWfFfy7D8VGe5ZmYD7/EZAQLMEXByV1kCjqoAUQdQIaAWAQGXhxu76lmxxy76AJjNgfDzNzzzPP2OiENySiYKCstQVVkrFXhUupxxxmqc/8tf4ZLf/QF//ONVuOyyq/Cb31yKM1edg7qGduTklSIpJRsJ1gxYkzNhTUpDQkISYqLiEBISDj//ILEpMEjPh954wgDDAiAKAcMeIOn/XhZ4MTWfMMBDZWSoZgACAAYDmuDmYRIrgbsx8PN92mg8Kf+nmkBDAA8f+XeZUID/TuslQMH4O1hMAfA1ByEoIEwUAMEhkQgNi0FsbAqio6wI8GPDQCQiw+MRG52I2OgEpKZkoKCgBEXFpfLfKWecuQqrVp+Fa66+Bj9t4fAKvP3W27AmJYvlJjY2AUkCAwqQn1eI3Ox8CRKMi00U9QCVP1x+3M2sFqSCgQGCXAwOZAOCDg00wYvhglQFEQxQJeDOgEFVNegtVgGCAC/4eJqkTUCBAAv8zb6wmMwICgxGWnIyVnZ34vq//AkvPfcovv3yXRza/w3GhrZhZmIXZsZ3YmZ8O6bHf8LU2BZMjW/G2PA3GBv4AgNHP8TRg2/jwJ7Xseunl7Dlu6fx3cbH8PVnD2HDB/fis/X/wIZ378JXH9yLHz57CFu/fhz7tj6LY3vWYfDQmxg59i4mBz/A7NinwNQXaphn8OCshgObVCaAQAINATQoMHabHeFbzM58jVlpElCZAbNTGzAtTQKfYHryY0xNfgSCAIEBtAkwQHDsTUwyM2DkFUwSCAytk0UYMDb8AsaG1FJBgs9jZOB5DPc9j4Eja3H0wL+wa8t9+Pazm/Huumvw1H0X454bz8b1l/Xg6os6cMU5bfjTmnZcc1Yb/ry6FX9e1YxrVzXjr6ta8LdVTbhuVRP+vqYVN53dhpvP7cDN53XilvM7cfuF3bjjwh7c/stu3HnhStx50Wm441en4Y5fn467frsKd/5uDe7+w3n45+W/xP1XXYSH//JbPE4wcMvlWHvXNXjhn3/Byw9djzefuA3vrb0bn6x7AF+89SS++fB5bN34Onb9sB57f/oIB3Z+JjWCR/Z9KfaAw/s22tUA+6kG+AbHDn6H3oPfGyDgR/Qe2iwgoPfwFnBRGcCKQAbyKa++GqapBFBqgH0Y7LcvgQHGawEAxon/cP9ecJ0IAZQyYGiA7/FzHJ/ZbRvq5wAAsQwQSuw4Tg2wU563g4CdMvwTAMga2I0Bfp+BvZDvN7BPgICGAnLqz2yAgQMYEhBwUMIBhwe5HxA7AC0BjkuFBBIGMCuAQOAwRgQGEAIcxfjIMbAakBYBggCxB2hbgNgEDCAg9yjp100AChDYAICDRUCC/DjMO9xzvNZKAN7TMMDxfbnW4X881deKAMddn/br90/YVROA40DPId/xtQYAx9/72dfHgYBpUQRQFaCUAQQBsqZHbIoAAoETlj71n+/kn0P9yRYmMMNlvG+DBfJ6UnXcywBqhNk5eN31sP/vdg77fObfD/0/30Zg+5zpcWj7gf7eeqDma339n+92G8DM7IzNEjB3oLeDgvlgwNzgQfuzdhgwPwjg6T9VAIQAHP41DOAuagDjnwGBgVYKqO9FNcLxEMaeV8DKQxsMIBQQEDAlQGCuOmBCwgNl+J+YsEEABQPsVYJqoKctgCoBx0DBuTkCGgzorAA7PCAkYDgg1QSsGJzG8PgMbBkB2iYgQIBZAdoioPYBAoHhafRpZQDVAQwJZD4ArQJ6N4IDxRowZIAAAwYwNHCAwYGj2h6gGgVsMMDJ2QdLnVVoIGGAWAPcWCdotmcH8NpQBRAILPXyxSJ3MxZ7WuDk5Qsnb18sM/ljubc/nAkDzAFwJQywBGGpOQjLLKpGkFWCXAQCKkQwHEsDIuAaRHtAODyCeB0ONwYIGkoAtgh4hzEjIBYeoVxxRoBgPNxDE6RG0F1ggBVUBHC5R9AOoBbbAiQkkM0BbA2INiBAdDLcuQx1gLIJ2AMEvcQmkAIvwoAYqgOU9J+KAJ74c+j3S0hVECA2BWZjWRgIGJcCC9UAsggIDIuBBBAqiCBqgIRUAQAMHvRN5HWaKAQcYYAGAsHJmUjIL0ZOVS1Km1tQ1d6OsoZ6pOTkIiw6Bv7+/ggJDkZMdBSysjKlBaCxqQF1DbWoaahDExP26adf2Y2ulV3oWtEJgQI8Qed1T4dqGKBNoItAQIEADs/2pe63drajuaMNDQQCTQ2orK+V7ICE9DTEpKSo4T2bgYI5EhKYzCpB5gQYdYOEAik2GJCPtJw8pPO9XKUYICDIyC+UdgFmDyRlZSE5O1tVF0q9YD5yKJEvVX752vpGCepraGpCI4MPmXPQTntDG9okULBDWhSoBqD6oaOzTVZbR6tSQnR2oK29XWCAZA+0twsAaCMMaGu3KQI6qRJobUdzUzPq6url9L+stAwlxaUoKS5BeVk5aqprUFtdi/r6BjQ2NIEybb6XkZ6JxEQrYmPiEEkgEETJsb+EgmkYQJsABz72ylMiLb3y4dGIiU2QFPSY+EQkJKciJTMb6bn8G5Qgv7QcxQIDalFWXSsNCwWlpcjMyUN0XIKc4Dotc8d/n7JUYMDChQYMYH6AMQRzmFVWAMIBlRkgJ/rSFKCsATzt53O8LwOzIavX+QE8gWfdn4YGcjovtYTGZ9qGfwIHZR3gMM4MAJUnoId0R7UAMwKWYDFrBRedarMK2E7ytbRf71Q7/IIhhyrPgKBiwX8r5QABxJJFrC1cJJCBuQTLnZwlHJEBiWwHUL8zB30O5Wowt9kH9PfgTvAgf0cFIfQzyhrgBmf5ek8spZ3hv5fJwO+2xB1chAEEAHoRBNBKQKjhmA9AdYC2CegAQf67wXBBrRRwd/GGl6sZXm6s27PA3Y1DNE/jeVofAD+ekAdHIjomEYnWNGRm5KIwvwSVlfVoaGhHZ+dp6O4+E52dp6O5uQsVlQ3IyS1GcjL/XU1DcnIGUlIyYLUmIzHeipjIWEnhZ4CeD1P1TX4w+wTAbPKX1xzcfbz94O3FpZL/vRjux4Ge8n42BUgrgFYCUBVgkhN/bxPraRlK62M8ZzxrDP4y8Hv4wMXVywYEtKKANYP8z4zJg356f/j7hqhawSDVJBASGoOEhHQkJWYiOChKGgYiwuIQFUkgkIC0tEwUFioYQLXP6WeciVWrVuPqqwgDKHEHPvroY2RkZiEgMATR0XFIjE+S8MCighLZs9hUEJsgif6+VAX4Ekr4w+LDakFCPz3gK2sDoYAAAYIA2hz4n3nCHcIAI3SQbQIMEqSigI0CJk+TsgdQFcC8AG9fBPkFITYmFo11tbjs97/B44/ei88/eRN7d36Fob5tmBjZhdmJPZge24mJUb7ejJGB79B75Avs2/Uetm16Bd9ueAqff/AQPnz7Prz98h148anr8cwjf8YT912Jh+/6Ax6643d46NaL8cTdl+K5h/+E1576K95fdzO+Wn8Ptm58DPu3PIfePa9h6NBbGO9/D9PDHwHjn2Fm3IADHOxpJ8D3Rs7Ajw7hhJsAWgyYRyCLEOFrYOYrYGqjggtTVAZ8hunJTzAzRSDAzIAPMTXBzID1qlaQTQKjr4kqYFzCA19WjQLD6zA29CJGBxkg+ALGqBIYfA6jA89h8OhaHNn7JHZufhAbP7gZrz9zJR6540LcdMVpuPrXLfjjOfW4dFUdLjuzAVed1YK/nNWMv6xuwrWrGvCXVU0CAv52ZgOuO7Me16+qx/WrG3Hj2a246dx2Y7UJGLjpvA7cRCsBIcEvu3AbAcGvVuLOi8/Enb9dhbsuWY17DMXAfVecjweu/hUe/svFeOLG3+PZO67ES/dcg9cesfTLxAAAIABJREFUuA5vP3YzPlh7Nz59+SF8/e7T+PGzddjx7dvYt+VDHNrxGQ7t2iAWAQYHHtvPwEAFAo4e+BbHDiprgFIF/IhjogrYYmQFbBFlQL+hClDZAJTpc4Cn7F8vNcgPDeyH4xoe2Ifhgb1z1+A+GcQ5jM9dyk5AGMCcgKH+PbI42OtlBwL2ezL49ykIQGWAflbuG+qAAUKAwd0Y5BrYgyFZ/P4c/NXPLMP+ICGAAgFsCBgZUIswgJkAajETgLaAAxgdPijXfD02clgWVQEy8A8rEEAAwFYAtWtFADMDesXPr3elClAwYD5bgAIA89gFTgIEThj+j3tO2QH67CCAcMAGA04c9H92gJ8HAvyvn3eAAceDAN0ewF1bAzQEmGJzgLGmZ7TH/0QLAIf8WT3w/w/2k8EAPVjL6bWhFND3uJ84kNoH1J+DAP+b9/i9jocBjt/f8ef6n15TDUAAcPw6GQjg/eNhwM+DgJ8HA9oiIFWCtGQYFgF5zcwAAwbo30eCE40MA6VC4D8DvVRwoFYnzAsDJqkOsNsERgkAxsZFHTDMa2ONiORfBQIO2bIBOMhrGKB2PfzPt8vgz+HfWAIDDBCgmgQMGKBBgCgCCAwUAODwr1UBcn0CDFD2ACoCWCeo7QI6J4BAgIoA7loVMAcEjPL72+0C/4chgctdLXBig4ADDJA2ATcGC5qxzMOMxVQHeJjhJMuCxR5qOXn6wsnLD0u9/eBs8oOLyR+uPgFwJhDwDYaqElQwYLlvMFwDwuAeFK6aBALC4URlQGAE3AIZJBgOV+YHEA4EURkQDc/QGLXCYsUawGwAFRYYr2oEwxIFCHiEGyAgPBGekTzxT4JLZKIsQgAO+8wL4C6KgOhkuEbxHgMEOewnwYvhgdFUAqjX3rGEAQoIaAigKgatMuxz4KcqgCDARGVBtLIamKkUkBYC1UTgIzAgVdoIlFogBX5WVguygUDZBPhaYIA1Db5JtAqkyfJPpk0gDaGp2UguKkUBh9C2NlS1tSK/sgLxqakIDAmDxWJBoL8/wkJDYbUmoqikCE3NTNmvR2NLk4AAVujZYACBAJP1V3ajW19TLUAlQA9P1Q0Y0KNe8x6hANsGeOLe0tmOpvZWgQFltdXIKiwAYUBsSjISMxggmItUdqDn5iKZQYK5tAkQCKjF17QLiCIgN18N/6IQKERGAUEAgUA+0vj12YQBWUZ9oYICGfkFMgwXlVeCYXnML6Dfl2ng9Qw7bGqU9oSmlma0tDJXoFWaBjoEBjBssBWt7S0Sktja1oLW1lZZ8qxct6GttU1gQGtbO5gT0MG9pQ0MD6yjLL+iUgAAgQBBQFVlNWpralFfV48GwoD6RnmO7+Xyb5GSKsqNmOgYhNIu4BdgWAUoF6YcnAoB5ghwuOFQYJbkcp7GRkTGIDouEYkp6fJ3zcwvRE5xqQ0GlFbTrlGLksoq5BUVIzk9EyFhEeLjXrLUzQYDFtAq4FAHyGsm5nPAd1q4DIt/sRhLjMwA3uNJv0jt9RBMv7uRes9TcA7CeojmaT2fl880TtlZRUjAwBN/ySRYpE/xHWr+xDJAG8ESqRXkLsoASf5fLJWETos5yJ+CxQtONT5HKQH4+YQLHNAJAnTqP0/5F5/iggX/rX7fRQuWYNHCU7B4IdsKFIRYtsRZTvL5++gTeQYHEgYQDnBA14O+3rUVQKkInOXrOMTztTxD+f8SDyxb7KHUAwtc4LyINgE3LF/ogmVUBTBQkOoCLsPe4AgD+LNoFYBtp12AMGC5JzxcvG3Ly9VHgIAHG16cveHi4g13nix7WkSu72MOgMU3CP7+IXJSTnl8YmI6UtJykZlZiNzcUmTnlMh1WloukpLofU9BQnwyUpPTJX8gOSkV1ngrosNjEBIUJvWGHHRZmycgwJtgQFkBWKfn5cml1AAcbEUV4GWWIZ5AgHYCaRmQikCCAdYOsp5W3RdlgAENePqvhn7CAdbZqvYNqgnYwCFwQeoFzTB7WWwwICSICpwo1SoQGg2rNRMpydkIC+HvQGVAHP4f2t4DyqryXuPOuutLVOr03nvvvc8wDDMwvcIUGKbQiwJSROkKIh1FxYqN2EWxRI0l9pqbxBoQAcVGnd6A51vP/93vOWeGwRi/+6273rX32WefMock6/5/71MiwqIRHRWHlOR05ObmI3f8BFH7tLS0YubMWVi7Zh2+OaRgwIcffCS5Aj4+/lJJyDyPzPRsCQ8cl5OH9LRMRIZHKxjgThCgYID+ndycaRVgmCAX8wM4/Bt5AQQAogqgMkCFDCoVgYIBLs5UCThLVoCHO0MDPeDNFgF3b0SEhiMvNxcL58/B3tt34O2/vYgjhz6RIa+n4xj6u47jQu9x9HYcRtuZz/HLD59IZd2nHx7Am688gBee3I3H923EA7ffgLt3rsCumxbiltWzcfPKGbhpWTPWL56GdYsacNPiqbhlxXTsWjMTezfNxwM7FuOJO1fipf034e2DO/HJ63vx9ccP4cTXT+P0sRfR/tOr6D7zBvo73sGFng+B3o8BSv4JBQb+qRoDaCu4yOGf4YR68dr/qnXh77h4/mNQGXBh4CNcGPhAwYABWgUIBN7GQN9bGOh7E2wT6Ot+Gb0MEGR4YKdqFOjpfB7dnQfFJkCrQHfHAXS3H0DHaYKAR3Hki/vx7l+34OkHr8Odm2fjpqW1WDWvEtfPKsPKlhKsainDuplVWN9aKSBg08xK3NRSjo2tFbiZQKC1Eptby3HLjHLcMrMSW2ZXY9vcydg6p0bWtnm12DqvFtvm12H7/FrsXFiP3QIDmsRKsGdJE26/thl3LmvBHctasHfFTNx1/WwQCjx00yI8tmUZDuy+Hs/fsRZ/uecmvPrAVry+/1a88/Td+PSVR/DV+8/h+L9exw9fv42fvvkQJ4+pzIBT3/8vzvz4L0hOgCUMkOBAWgSoDCAMOGTkBXwDBQNUTgAHdSoCFAwgBDCvjjYO+lw/QIEABQO6LKFA+wl0Gkvdq6HACXSc41LKAAUDCAWOoaONQzytA0fRds68+y+DvxEsKOdtZhjQwfM2w2Ig51QF6OepOCAUML6rAQEIBAgDlBLgJ3S1GcuAARz6tR1AgwBCAKoCegwg0NvNYEC1euScIYEaAmgVgFEh2HNOrAA9PFIRIGF/Kvhv6DCvh3dK+oc+95seayWBYQ/Q70cA0G+x628p+f/dA70FHBhqCdCPhx7lsyxAAG0Cw8IAWgMGaA9QQIAwYGhjAC0C9P1bLm0DkB1/CwigbQFKDdAroICwQC8NA1TuQJ9pKNVSdeYIyG61aYfavBOvq/KGZgr8noH/t7zGEgCYzn93ZsBww/rQa5c+JhAYHhhoS8CvPW+hEjAGfg0DJK9hEBAYECCgYYA6Dp9RoBoEzJkGhAF6KWUAQQDrBQcscgOoDDBDANoFFBDohwICSvavdvg1CFDBgQQDBAUaBGgVgL6mIUCbBRCQc7EK0CZgWSlohAZ2KRggSgBDDaChgFYFSGZApxr+pUKQOQECA1Sd4FAYYGkRYDtBew+kpYCBhYQBOjfgD2PYHCBZAa5KFWDrBhtbN9hSHWDnhrEO7hjrxJwAd4ziubQKeGK0gyfGOHnBytkHVs7ekhdg5expAQOoDPA3qQIkK8ArQGCAjW8QrHyDMcY3RJaVTzAcfIMFEjBM0NE/zFAHhMIpMBwOgRGyLHMCnINj4BocB+fAWAkOdLK0CoTGwjokBtahsWINYIsAFQAc/DnoyzmVAmwSsMgPYKuAWvFSG6gyA9gSwCrABAkUdGZ+QHisAQHi4R4RD3eqBSLiJZTQJYLncfI88wSoCnCNZK1gsoQQukcnwYOKAlYNEiZE67wApQzwiksRGMAMAaUUSIRvQjLC0rKRWjAJBVVVKK2tRWF1FVLH5yI0OhqePvx/PBkm5QVfH1+EhoYiNS0F5ZVlqJlcJYMwQ/Uam4x6vaapmNqkFAI8EgbIY7EOGDBgWi2mMGCQEKBRLVEMEAbUEwrUitqgpLIMrC1MycpEVGIiIhMTEZ+egSQ2CGRkIVkgQBbiWSWYrRQBCgyoQEFRAVAJYLQMpIgigLaBbKTmZMv7JmZkiDKA6gC1MuX9qR7IzivAuIKJGD9porQbTCwqQlEp4UAJikqLUVJWKnYJNiKwelCG/bopoh7gORsTJtdWYwrPCQ1qqjG5pgY11ZMxmatmMmpqJktgIEMDq6prUFlVLQN/SVGJAAFCgeLCYlEFlJcqEFBRXonKikq5j8+Py8kVdUBCfALiYuKggYCnh6dYBZgeTh8x/cL2tqwbc4ejnbsMW9yJ9fdXqfGx8UlITE1HGr3KefkYx8yCSUViFZhQWILxBYVIy8qRoEEPb1/Y2DnjqpE2+NOVVoZNYBgYoAPtRlrDmq0BQwIEzYOuedDn8M3hl4O0DN4moKDuGXmFlQAGDQNoFdDhevqaVgTQHiAZAUZ1oA4RVMeRIAgYK7WEV2DklVdItoEGDmNHUuJPNYCqPWS9H78PwcBVfxyLkQIIrHDVVaNw5cgrMWYUcxEUDGBeAod77sDbWqkBXO/OEwbwOf03ahigFBTmrAB+D30f72FmgNUoggRWBRIs8H2cjEYDlW3A6/z9RGFBy4ORUaA/mzCA5/KfBWYDWDnBYawjHK2cJGiOYXOy7FzFViLwiJkCNg4SRunkyKo6/mfJBfasrnNyhz2zKBwJCLzh4RUAv8AwhITGIDw8HlHRSYiOTpYlICAqHnGxiUhOSkVqcqoAgfiYBIQFh8OfihZvX7i7M73fQ3aq2YDBYV4GfTYFSMuMeky/vygDtCqAMEDO1WtoIWBgJlsF+D1lERxYDvuSK6BUD3ZO7rAzcgbEJqDzBhzd5H3cXLzh4xWEoMBIBAaEw9c7SI6xcamIj0tDcFCkhAuGBkfI8B4Xk4C01Azk5IzHuNw8FBeXoKmpGTNnzMS6tevw7TffijLgww8/Qs64XLh7+IhVIjIiGlQDjMsZj/wJE5GZkSM2Ch8vP3i4URHA3AAFBQSauHjCw9kTbo7ucLV3gxttDXYMPnSFCzMRqACQdgEn+d8D2grUcoKrC0GAM9zd3KBhAIEAbWHZWZlobpqGLZtvxHPPPIovP/sAP5/4Eu1nj6C38xj6Or5Fx5mv8NN3H+Pwl69Lu8BfnrsfD9+3BXu2rcTWtQtx4/IZWHX1VKxaMBXLZ07GspYqXDu9EkumVWDJtHIsa6rAypYqrJlVgw1zp2ATw/OWTsdtq2fh7k0L8dDOa/HkXTfgpf0b8c7zu/C/b9yFf3/0MH48dABnvn8RnSf/ih6Cgfa3JYDwQu+HuNj3IRgMKCGErBGUIEKGEVJFQGhgrPOfmGDA+YEPcX7gAwwMfIB+yQ14B/39b6NPYIA5QFBCBDtfkhBBCQ+kGqDrIDrbn8W5s0/i3Okn8NN3j+DQv+7BW3+5GY/eey12bWjGukW1uH52JVa2VuCGlgqsbinH+hmVWNdagbXNZbhxRiU2UhnQWmlaN7dW4ubWCmyeUYGbZ1Zi86wqbJ5dJcdbZldDFsHAvCnYtqAWWxfUYvuCeuy+muqARty+uBG3L5km645rG3HX8mbcs3Im9q2Zj4fXL8BjG6/GM1uX4bldK/Hi7Wvwl7tuwl/uuRmv7NuCtx6/HZ++9CC+fvdZfPvpK/jus7/hx0Pv4+ejH+OX43+H1AkKCPjMCAtUDQIMDTz7y1c4J/YAwoBvLJQBKitApfsrAGAK/zPCANVO/wl0cdinIsBi8Lc8N0MDDQ8UIFDXOaQfR6fFIhDgYN8uIOBbtJ/7Fh3njipQwGtn1bX2NoIC45xHPm4zYIIBFfjeZmUAv+MPygJAG4C2A7T/iK72H9Hd/pMsrQrQIKCLAECUAKoysKfzJHq7flFLw4DuUxAYYFgCKNdnUKDOAug22QGM9P4ey+NZ5ee32M3Xw/vvggGGJUBea5wrz7+yCBAAXH7w53MKGJiPv3b/YKuAHvr1++vHQ4/DwQAVGqgtAsbxfBfOi0Xg12BAzyAQYBkIOBQGaDsAYcDFi33AkMXnFRBQ1gG9Q00YwAGVR9M1ExCwGGoNG4ElEPgtg/1/e49p+B8qkf8/gQF6kL90+B9+8B/uPr6H/l2GAwKWz6tqRP6uyhagjjzX4EUgAX9v03vyvfl48KIaoJ9rgDDgvJxrEMBqwV6GCPZzKSCgQwSZF6DVAOpoZAfo6wwH5MAvQ78OGdQwQF8f3iqgYQBtAfrcEgZIk4CRE2DKCzCaBEQRQGWAsSxBAGGADg+kPeCkAQN0cOBwMEAsAt2Q4EBmBrT10CKgYAShBOsF/zDWUWUGjLVVygCqA6gKsLFXFYJUBYgigJYA1go6ekpw4CiGBzp7wcbFG1Y8uhIIeMHWzRs2XO6+khWgrQFiD/AKhK1PoLQJWPsGw8Y3FDZ+ajlKeKDKDKAigEDAJTAczkERcAyKHAQDHJgbEERlQKwslRugMgMcmBkQEgtb2gMMa4DYBEJjBQJQBaCtAQwUND02oIBTWByctFIgIkFqBl2lMcAcDOgWGQ83GfqpJFAVhLQVqPsYKpgIDwvbAJUBhAEebA8gDIjm40R4xiTJEjggNgFWC6bAPTZJcgVoJWCmgF9CCqKyc5FRWIzCmskor69DQXmZ7JQHhIbCzdMLHu70qXrDy8tHPOlUBxQXFxm74fUqSX/6NEMJQBhgnDfWCwyYRjhg2AVEBUB1AFdjHSYbYGDKVCoCpqCGw3TtFMkhKCwrxbiCfCSlpyMqIUGAQGJGJpIp+ScMyObQz4rBbCSyizvLaBSwUAawiSA1OxtJrCPMzJTXpFA1kJktlXzJGZnge9IuQNAg7QSiOsgGd8gzcvOQmZeH7AkTkDuRgXqTkF+kqg8nFhVKfkJZRTnKK6mUYMZAlSzCAaUKqMLkydWYPLkG1dXVsmqqalBdVYUaPq6qEjUAIUBVdbWcc+e/rKQMpcUlKCkqlqPYA8qUIqCirELUAVQJEBQUTChATnYO0tPSZcCKj4tHeFi4wBumg3MQYLq4SMFtqAxQMICVae6uXrIbGxgYKu0AiSnpSMvMkQBByQwgDDAW6wQTklMREBwKRxd3UBXArIArR1hDAgSZhn+lDcaKEkANpByeuTNtM9oWtiOtMOZKDvLKl0/JvagGZNdfDf68n8s83FOWPwQyiEXA2JW/gjv9rA6kxYC2AcvMAB0syIrD0WB4ICGAXswLGDNypAEDrsTIK0dg5BVjDSUDvz9VAfx8ZQ+gEmDEH21kKVWAHa66kvkIYzBi9CiMGqlUBwQIVqNZN2gLO1Y72qiAPg7helkO+UNhAH8vpZwY/DvIfSMVDBC1wRgqBBQM4PsRnggIMDII1P0KEvDfnmBCwwDaAWSJGsDZpAZwonqE6fOGrJxqEgkY5N9hS5sJ7QR8rTNsbZxga++CsWPtYWPjDHsHDuHe8PIJEi99aFgMIiIIBBIRFZUo9YHRBgxgK0GKAQOYXREcFAZf3wAjM8ALbm70w6thXlkBlAqAqgAqE2Snn7ve0gCgdvEFGDBMT2wDBAfMFPBUFgHCAIICk2JAhQs6UQHg6A5mCthpSMBGBd2qQAm+AQPcXX3g6x0sQz/bBPzYKhAUgWgCj6gEBLFdwD8UYSGRiI6MRXxckvj9GSA4jlkrpaWY3jgdrS0zsH7tenxz+IjAgI8//jvGj8+XrAR/vyAJERRlQG4+JuYXIjsrV2AAqwc1DGAVIRUC8tjVS2CAu5OH2BlcCAP0MlkIqAZyllwBV2fCDVYSOsPTzRUebm5wd3MXAMPgQD9vXyTGJaK2pgZrbliJJ/Y/gE8+eAM/HPsC7ae/RXfbcXSdO4KzP3+BY4few6cfHMTLB+/Dw/duxc5N12Pt8rlYOqcei5oqsaCuCHNr8rFg8kTMrZqAeVUTsKA6H1dXF2DRlIlYVl+IlVOLsHp6Cda1lGFtcwluml2JzQtrsW3JVOy+vgV718/Bvi1X4/E9K3Dw/rV444kt+Ojl2/DZu/fiyD/248dDz+Ds9y+h/ZdX0H32dfR3vIXzXe+pnIG+jwwwQDjA9bGxPgIG1Lo48KEoA85rm0A/bQJvob/3TfT1vo6eLt0k8JJqE6A6oOsFdHUchOQEdLBJ4Fmc+vkxfPftQ/jnx3vw+osb8fBd12DLmnrcML8cS1vKcF1LOa5rKsPqlgqslVWOdc1qCQyYUYWbWiqw0VhUB9w8o9K0Ns8iAKjB5plVuEXOq+W4be4UbBd1QJ3YBTQM2LNoGm5fNA13Lm7E3mun4+7lLbj3uhnYt3oOHl43F3++cT6evGUxDmxbhudvvQEv3r4eL9y+AC/fsQEv33cL3n5sDz596SF88bencfjDF3Hsn6/jh3+/i5+PfIhfjn2M0yf+IXWC5376Ame5CAJMMOBrnDt5COdOHUHb6W/Rdvoo2s4ck6T/dkn8JwxQOQFqN1/t6lMN0NX+A7oMZQDP1bBtVgOYoQCfG+a62Aq+Q2ebXgoMiDpAbACEAAoEdHLAP3cUnVxtR9FhwAB9VNcUDNDqAjMM0J+tYYCyAWi7gICAjp/QbbIH/GTYADQI0IoAgoCT6LOEAToTgGCAFgGj3k97+RkMSDUAq/vUuVYDWBwHKQDMAX6/CQZYvtYIG9QwQR//u8Gew7/lGjzw60F/uKMe+od77pJr/1EZ0KUaBUQVoMIDf00ZoAIDzZWBlioADv5D11AQwMdiKWBegMACswpAD6OmgVXL1i1q7wYPqmoQ/v8DClwWBBAM/E4YMNgmQMuAef12AGAJBSyHdMvrPFdDvZb+8yj1gYYSQEMASxCgf3/9GpUboD9j8Psre8AwyoD/AAMGAwEVHihqAaMlgCBA2QOM2kEjbHCQMsDCSmBWCpgzAgQI9AzADAMuqLBAwgAO5RZQQIcHKhBwQXICBsGADqMuUEMAXSnYTrWAhTrA1CAAnOtUeQFt3VQFKGUAcwloSWjvvqiqBbnTzzYBqgNoCWC1oJWDB6wdvGDt4AG2CIxxYnOAggFjHD0xytETI509JDuAagAua4IA5gZwuTNA0A92zAgwWgQYHujgEwQbI0DQxicYtgYMcPAPl0pBR3/aA0Jg7x8moYFugWwQCIcjrQKGTcAxiKGBKkDQNSQWzhIaaBEeGBIDO2PJ0E8IYIAAq

October 28, 2024

October 10, 2024

January 11, 2024

October 08, 2023
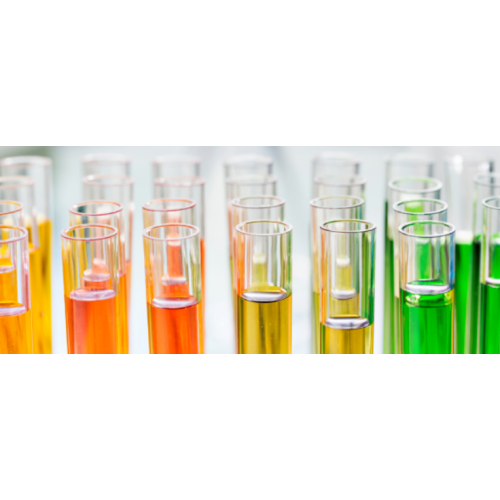
February 01, 2024
Robotic products have revolutionized various sectors of commerce and industry, driving innovation and improving efficiency. International standards play a crucial role in enabling these advancements...
On September 27, 2024, the European Commission published two amendments to the EU POPs Regulation (EU) 2019/1021 in the Official Journal: (EU) 2024/2555 and (EU) 2024/2570. The new regulations reduce...
Innovations in wireless and connected devices inevitably bring security concerns, prompting regulators to constantly monitor and tighten requirements. The EU’s Radio Equipment Directive (RED)...
Email to this supplier
October 28, 2024
October 10, 2024
January 11, 2024
October 08, 2023
February 01, 2024
Privacy statement: Your privacy is very important to Us. Our company promises not to disclose your personal information to any external company with out your explicit permission.
Fill in more information so that we can get in touch with you faster
Privacy statement: Your privacy is very important to Us. Our company promises not to disclose your personal information to any external company with out your explicit permission.